When I was first working out how to make over our laundry room on a $100 budget, the largest dilemma was over washer dryer storage.
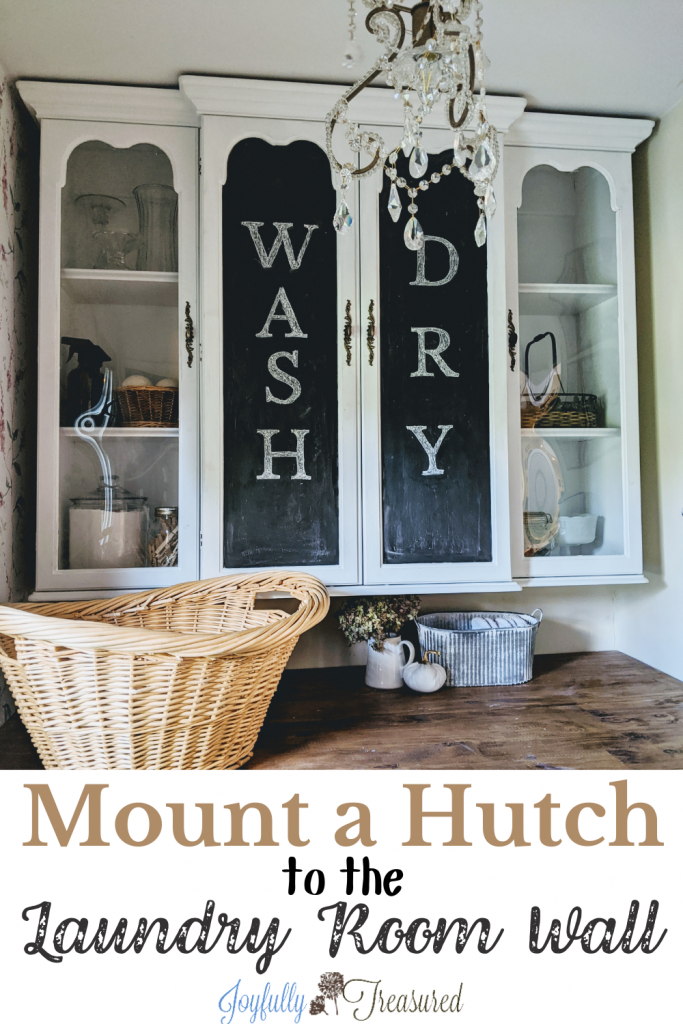
I love the clean look of wall cabinets with a hanging rod, so I went to Facebook Marketplace in search of an affordable kitchen cabinet to paint and repurpose.
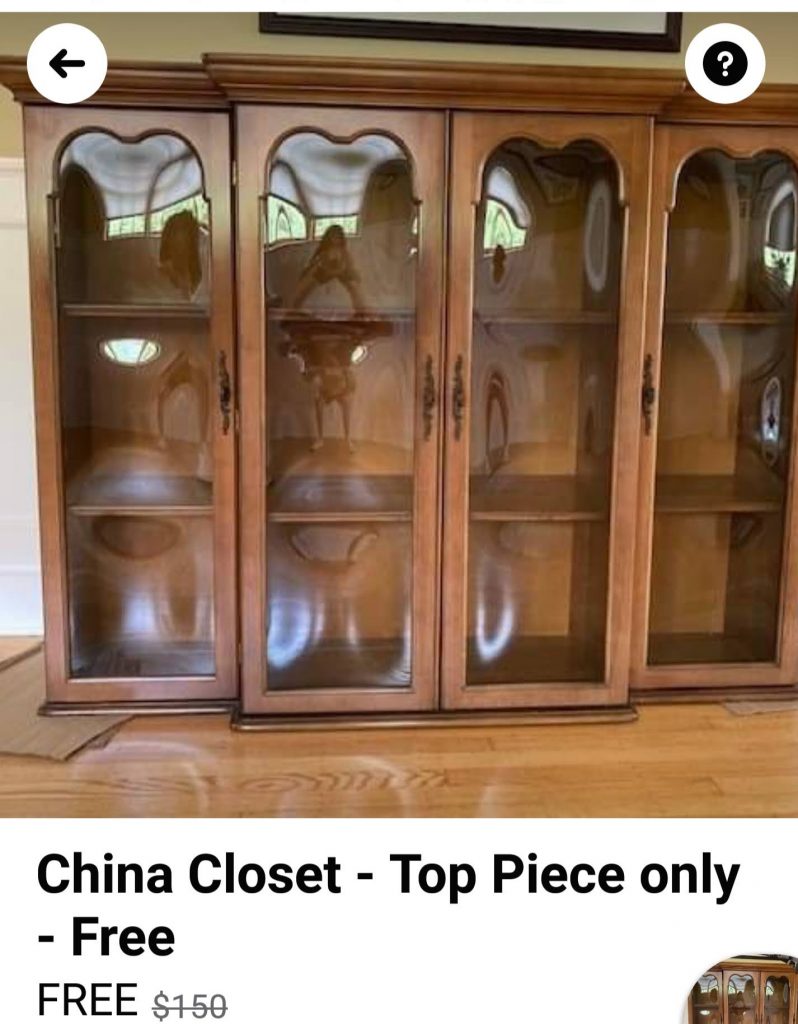
As I’m searching all the different iterations I can think of to say “wall cabinet”, I came across an old china cabinet posting…and it dawned on me. China hutches often come in two pieces!
So… I typed in “hutch top”, and I felt like I hit the upcycling lottery!
There were so many choices that were either very affordable or completely free, since they were missing their bottom half.
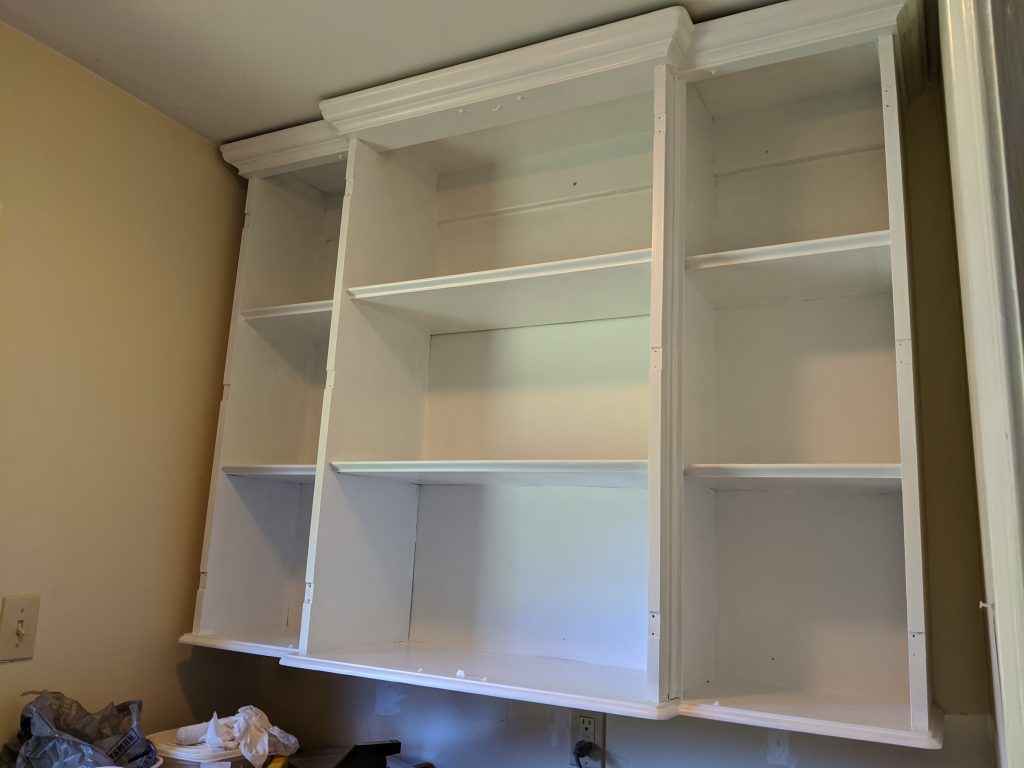
Before I went too crazy, I measured our space to make sure I picked a hutch top that would fit well on the wall.
Once I confirmed the china cabinet top would fit, we picked it up and got to work! Post contains affiliate links.
Painting the Hutch
First, I gave the whole surface a very light sand, to help the paint adhere.
Since I was working on this project for the $100 room challenge, I wanted to stretch the budget. So, I painted the hutch with kilz oil-based and some latex oops paint.
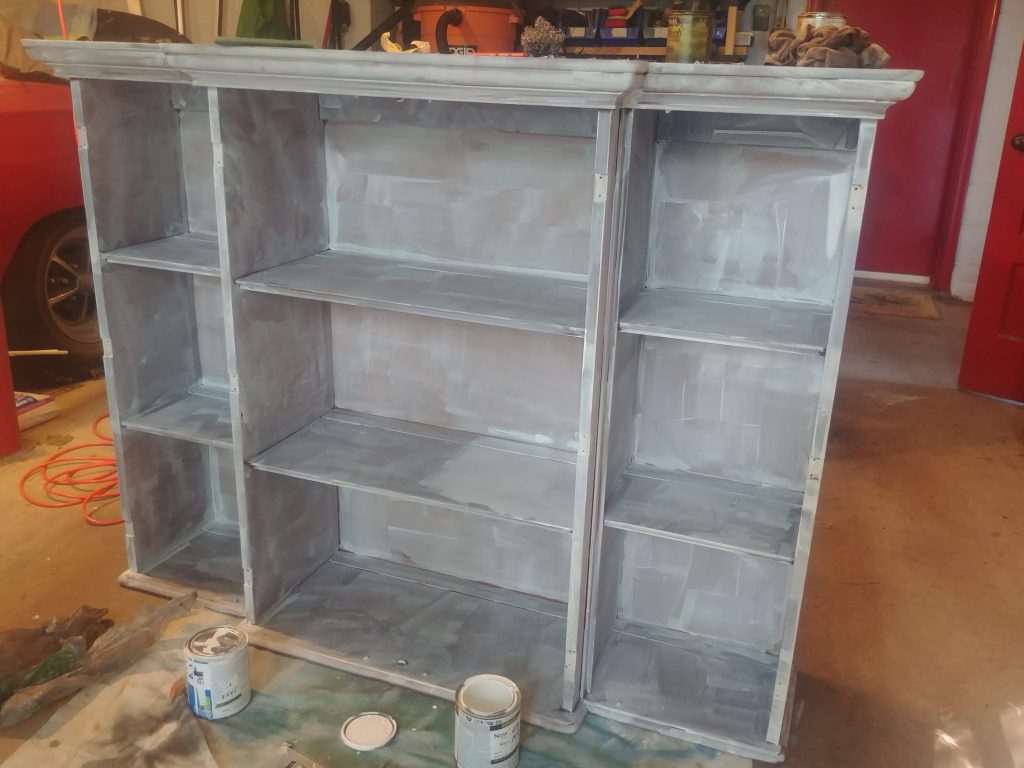
To minimize brush marks and drips, I use a foam roller everywhere possible. For the corners and crannies and doors, this little wooster brush is my favorite.
Side note: Being honest here…I think I’m done using latex for furniture. It took going from latex to chalk paint… and back to latex for this hutch to realize that chalk paint is just a lot more user friendly and forgiving.
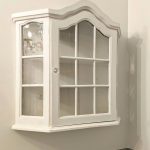
On the plus side, chalk paint has become really affordable in recent years. I love the coverage of this brand I buy on Amazon. I used their warm linen color on several pieces recently, including the bathroom curio cabinet!
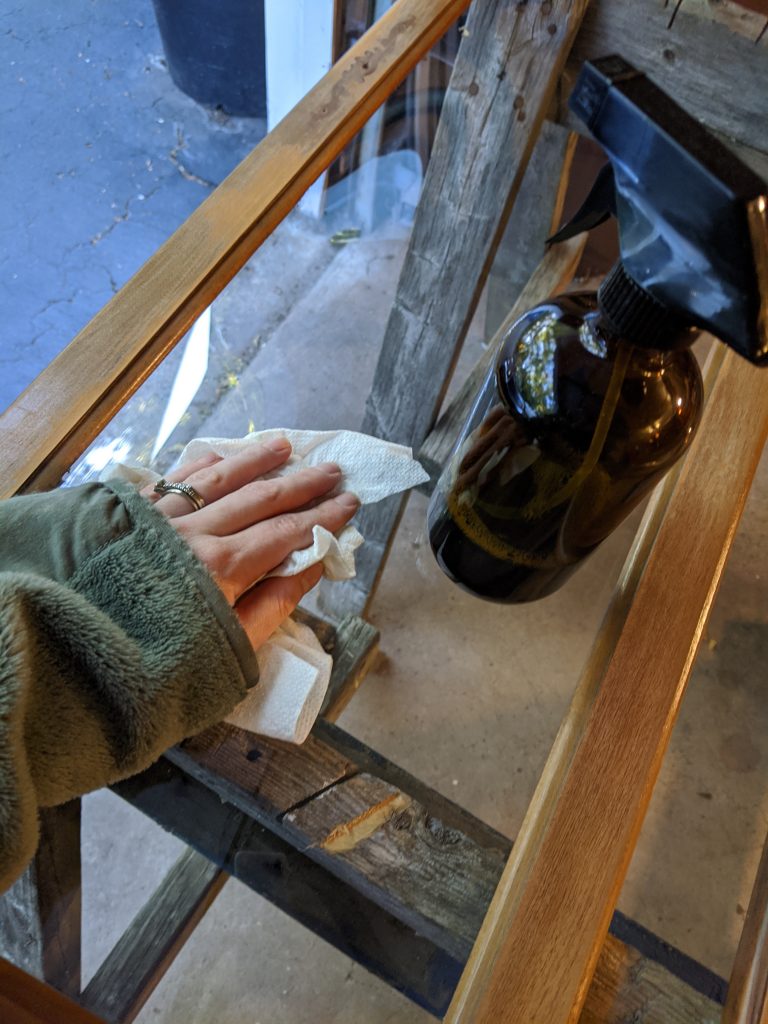
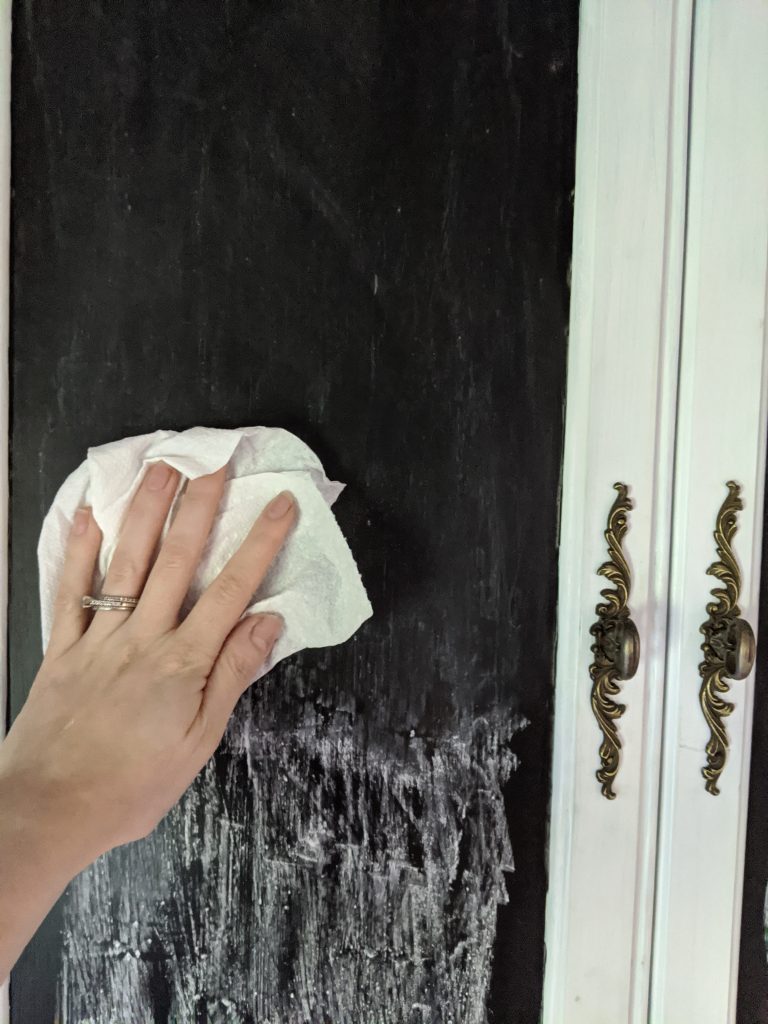
Okay, back to the hutch! After I got the base painted, I moved on to the doors. For the two chalkboard doors, I gently scrubbed the glass with steel wool and fine grit sandpaper, and wiped clean.
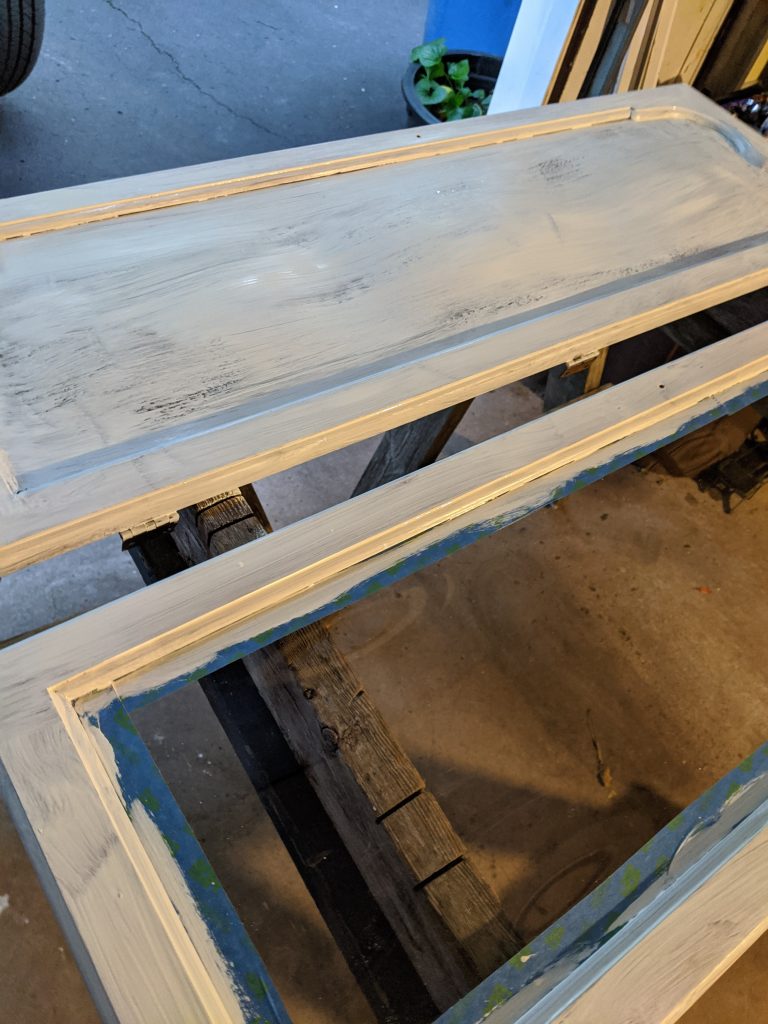
Then, I brushed a coat of kilz primer onto the entire door, both frame and glass. After it dried, I applied the white paint to just the frames.
This photo is of one primed chalkboard door and one primed glass door.
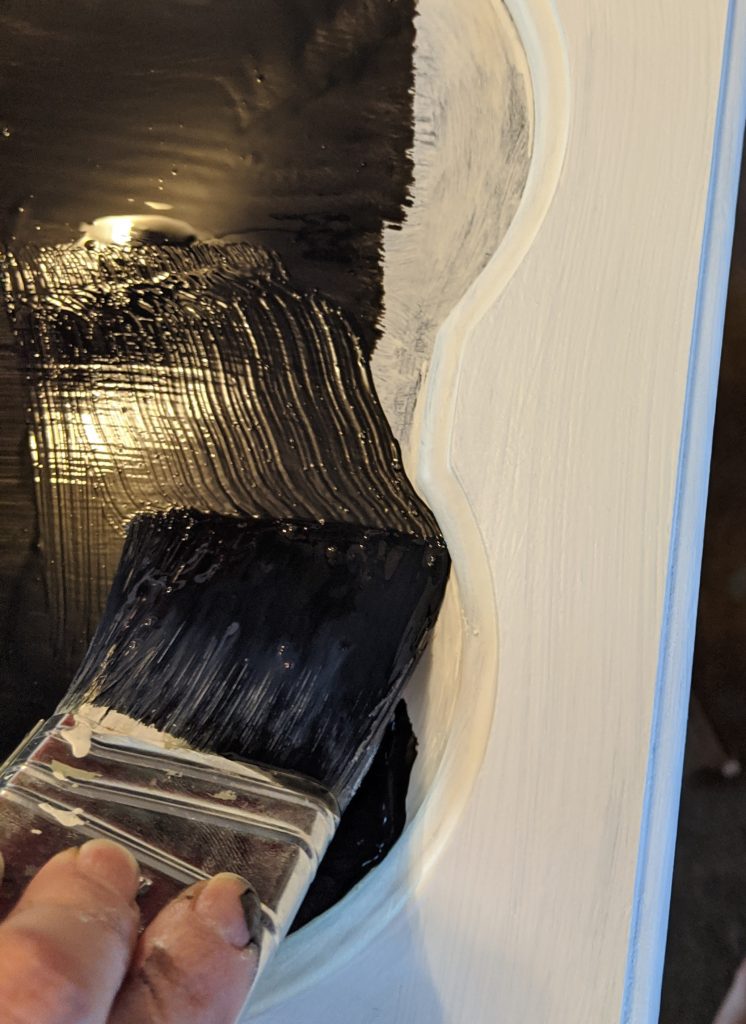
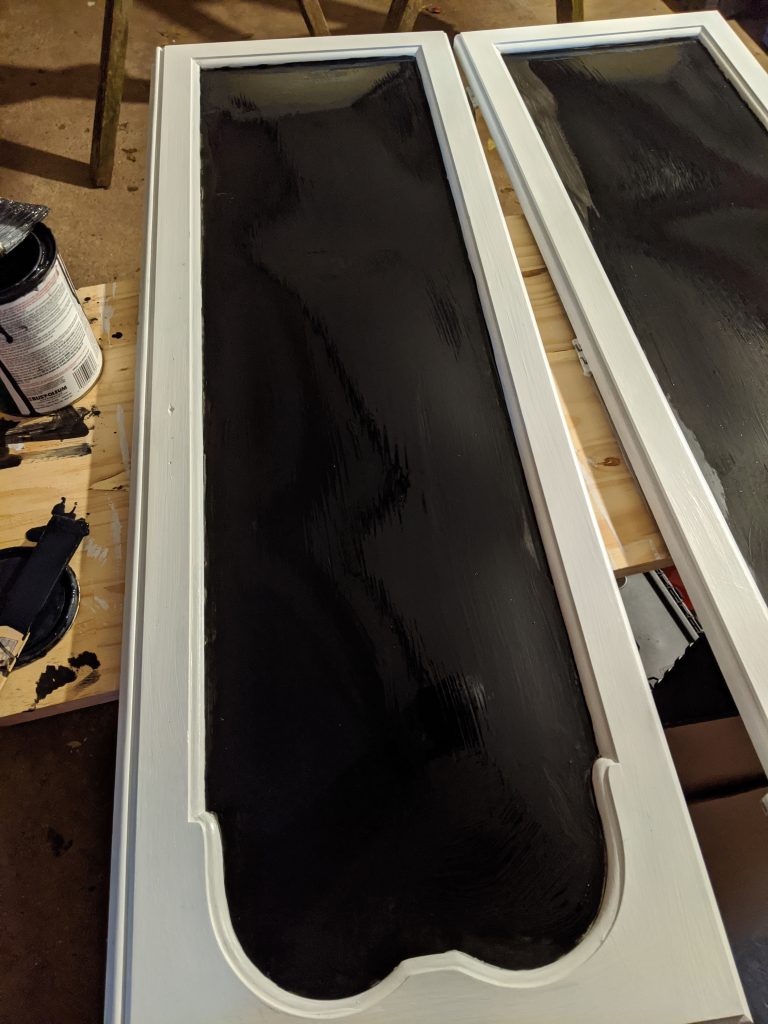
Next, this Rust-oleum chalkboard paint went on the glass, using this same trusty shortcut brush that makes it easy to cleanly cut in around the edges.
The chalkboard paint was a garage leftover from a project for the kids…so old and hard to mix, I thought for sure it wasn’t going to end well, but luckily it worked out!
Mounting the Hutch on the Wall
Before I added the last coat of paint to the base of the cabinet, we mounted it on the wall.
I’ve been meaning to write this post for awhile now, after having several questions about how we mounted the hutch top to the wall.
It was a bit awkward to get in place, but mounting it was relatively straightforward! First we used a crate to prop it up over the counter.
We marked the stud locations low down on the wall, and used a level to mark that spot on the back of the hutch for the mounting locations.
Before inserting the mounting screws, we predrilled the marked stud locations to ensure we measured correctly.
Below is a short video explaining the process.
Once the hutch top was safely on the wall, I painted the last coat, and touched up as needed over the mounting screws.
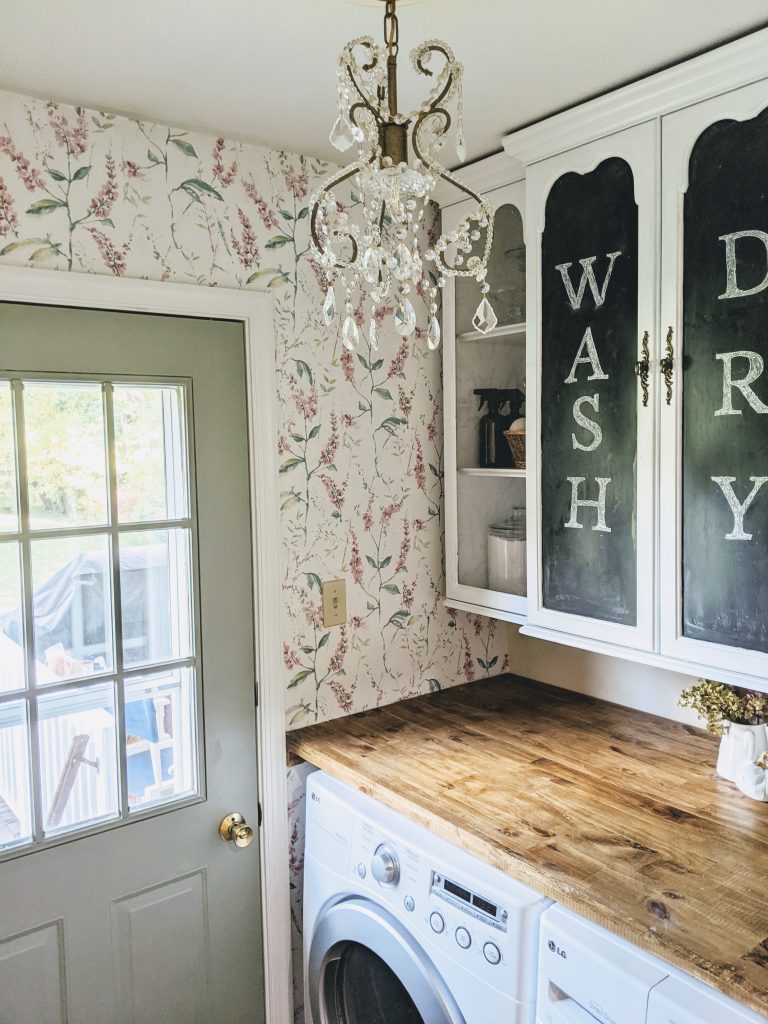
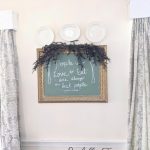
Lastly, I installed the doors and hardware. All that was left was to add a little art to the chalkboard!
Chalkboard Lettering
Once a few days went by for the chalkboard doors to fully cure, I seasoned them by rubbing the whole surface with chalk and erasing.
Finally, I added the chalkboard lettering. To add the lettering, I used the same method use to make wooden signs….as my handwriting leaves a lot to be desired.
First, print the letters you want to use for your chalkboard or sign.
If you like the style of this simple WASH DRY lettering, I saved the file as a template in the printable library.
Then, shade over the back of the paper with chalk, and position them how you want on the chalkboard with painters tape.

Use a pen or pencil to trace over the lettering on the paper, leaving a chalk imprint of the letters. This can be easily darkened and filled in with a chalk pencil or marker!
This is super short video explaining the chalk lettering process!
I absolutely loved this old china cabinet upcycle, it felt so special to get such a quality, chic over washer dryer storage cabinet for just a few dollars.
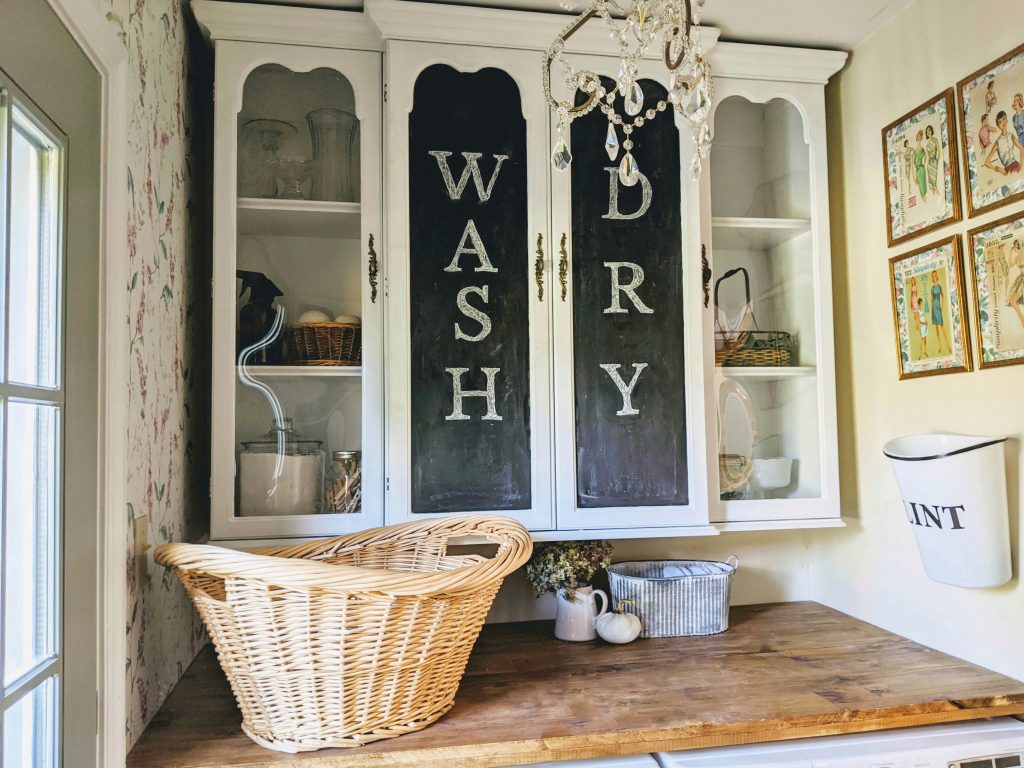
The two chalkboard doors provide lots of hidden storage, and the outer two glass doors are so fun for displaying the simpler things like glass spray bottles, paper towels, and jars.
Plus, something about upcycling is especially rewarding, don’t you think?
Do you have any furniture upcycle ideas to share? I would LOVE to hear about them!
To check out other DIYs for this project, take a look below!

Awesome!
Obviously inspired by your Hutch Repurpose!
I wanted to send A photo of my completed project.
I love how it tuned out.
Thank you
Tricia Faucher
Hi Tricia, Thank you so much for sharing! I am so glad this idea worked well for you as well. Have a very happy Holiday!
What an inspired idea to dress up & add storage to your laundry room! I’d definitely bite your style if I had an actual laundry room, rather than an 80’ tract house “laundry walk through” into the garage, with the water heather on the opposite wall.
In any case, I’m always in need of more storage, so it’s finally time to paint & upcycle the china hutch I bought at a yard sale about 20 years ago. (Some items you just know you’ll use, when you find the place it needs to be!
I’m thinking about painting it, then hanging it on my large bedroom wall, but it’s a bit intimidation, hanging a heavy 47” x 47” x 15” deep, solid wood & glass item up on a wall. But after seeing yours, I imagine its even larger & heavier than mine is, so I’ll use your instruction video that you were kind enough to provide. Thanks, & wish me luck!
Yay, I hope it comes out amazing, I’m so grateful it inspired you! It does seem intimidating hanging a hutch this way, but once I was sure I hit the studs, I could relax! LOL