These mini rose bouquets were a quick and affordable little DIY for my son’s school play. as well as a fun way to make use of knockout rose prunings!
What do you do with a lot of rose garden clippings?
Our beautiful rose bush decided it needed an emergency pruning one day when a large branch of it toppled into the walkway! I grabbed the pruners and some gloves, and with the help of a wonderful neighbor, we cleaned them off the walkway and filled a large box. Even with the ones she took home, I still had about 150 roses! I really did not want them to go to waste.
But what to do with them? What are creative ways to use pruned roses?
Happily, a thought hit me…. These would make great theater gifts for kids!
The rose avalanche was at the perfect time. My son was in his first play over the weekend and it’s traditional to bring flowers for your cast member. I thought to myself, I bet I could DIY mini bouquets for a lot of people with these! So, what better way to use them, then to make all 50 cast and crew members their own! There were even some extras.
The kids and the parents absolutely loved them, and they were over the moon at getting their own mini bouquets. The staff were also happy each student had their own opening night flowers. This was super budget friendly, and a great way to repurpose pruned roses and other garden clippings.
Supplies Needed
- Fresh-cut roses (or other garden blooms!)
- Baby’s breath (optional for filler)
- White paper doilies
- Fold-top sandwich bags
- Tissue paper
- Stapler
- Rubber bands
- Scissors
Optional: printed tags or handwritten notes.
Instructions Step-by-Step
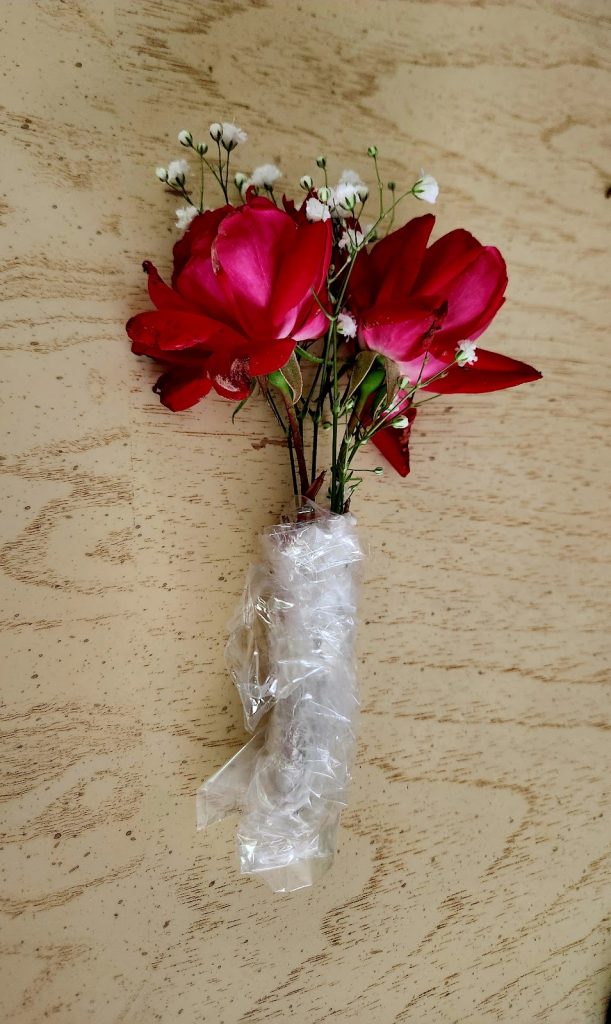
- Trim and clean rose stems. The knockout rose has tricky thorns and they can hurt! It looked so daunting as I looked at my box of green foliage that seemed to overpower the roses. I found that cutting off the main stems automatically made much of the thorn part disappear. The results looked like this.

2. Cut the tissue paper into squares
You can cut multiple pieces at a time. I unfolded the tissue paper, re folded it and cut it all at once. Go with whatever works for you!
3. Choose two or three and hold them together. Here is where you would also add baby’s breath!
4. Fold a napkin or paper towels around the bottom of the stems. I prefer inexpensive napkins or paper towels for this!
5. Dip the wrapped end into the water.
6. Insert the wet side into the folding bag and wrap it around. Then, you can either add a rubber band here, or after the next step. I did both, depending on how things stayed put (or didn’t) it should look something like this!
7. Take a tissue paper square (or two or three) and wrap it around the plastic bag portion. This is where another rubber band may help!
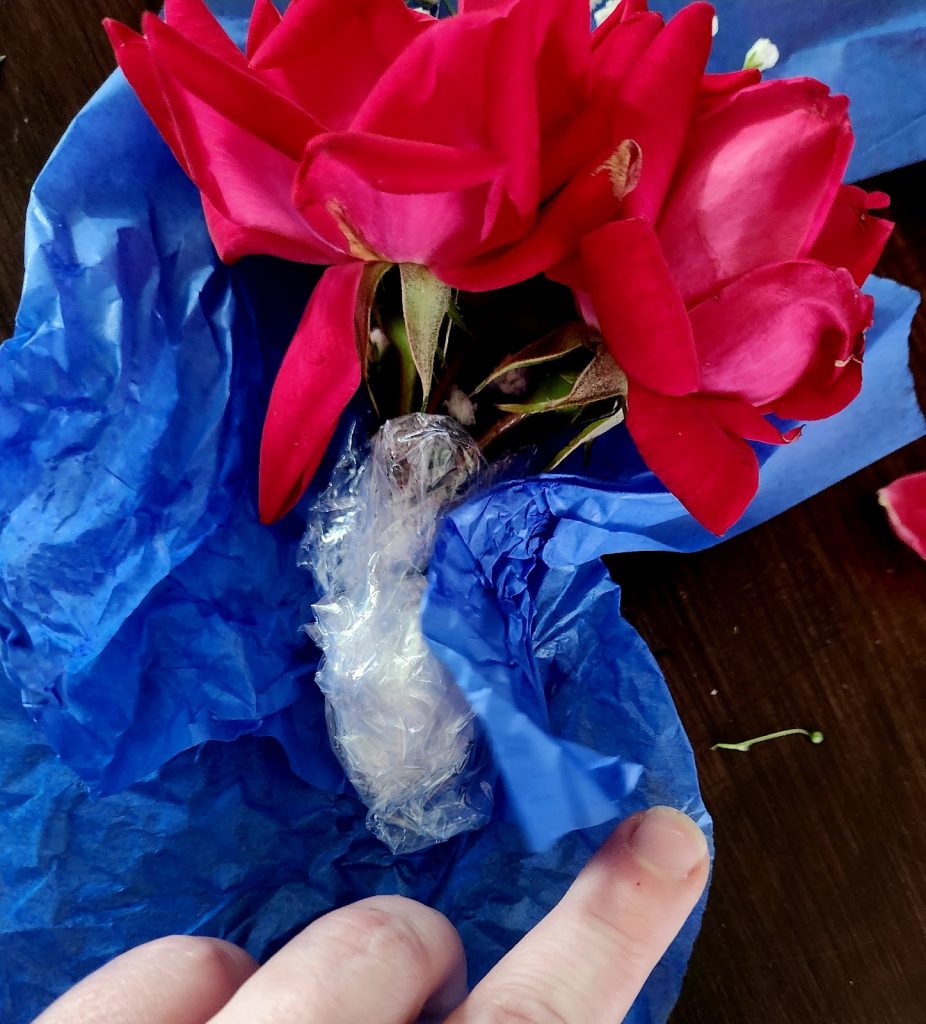
8. Fold a doily over the outside for a lacy edge. I stapled a small hidden part to hold it together.
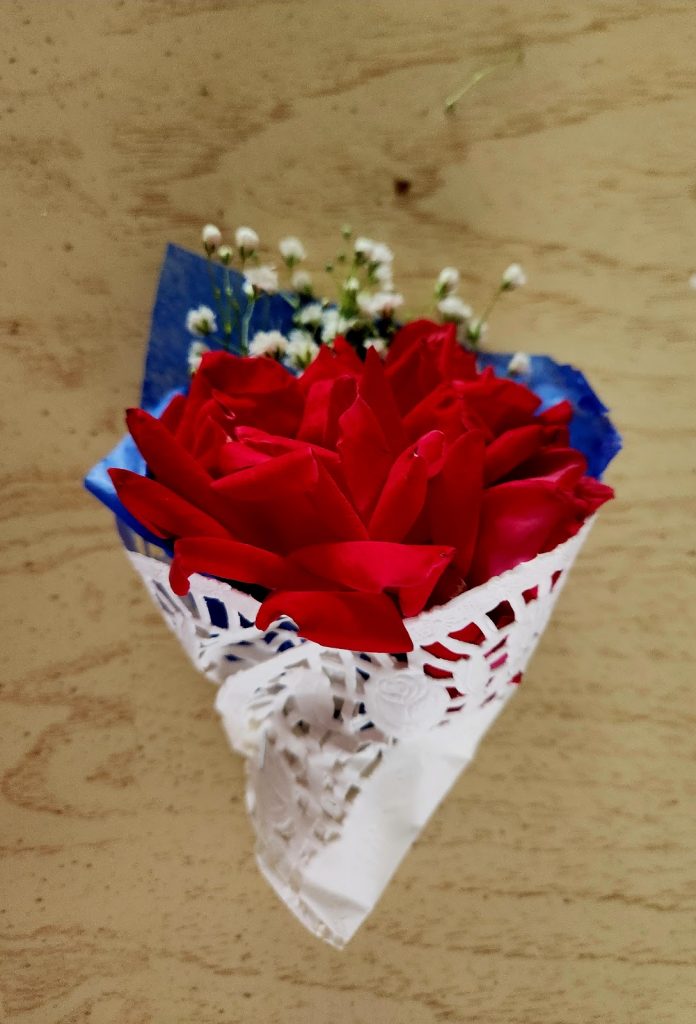
You can also tie with twine or ribbon, with a fun tag like these from Etsy for an extra bit of magic!
I transported my mini backyard rose bouquets in a large shallow basket.

So, what can DIY mini rose bouquets be used for besides school plays?
They can be used for SO many occasions, check out this list!
- Baby shower gifts
- Wedding shower gifts
- Wedding favor DIYs
- DIY Wedding decorations
- Musical recital gifts
- Dance recital gifts
- DIY teacher appreciation gifts
- End of the year banquets
- Church group gifts
- Teacher Gifts
- Crafting party activities
- Dance or piano performances
- Mother’s Day or Spring parties
- Garden club or neighborhood giveaways
Some Extra Tips for Keeping Flowers Fresh!
- Store in the fridge if making ahead!
- Mist lightly with water
- Consider floral tubes for longer events! (optional)
These bouquets were so much fun to make using pruning scraps from the yard. With just a few dollars in supplies, you can create something special! Do you have any ideas for using garden clippings? I’d love to hear about them!