I’ve wanted to add some sort of kids chalkboard wall to the basement playroom for months now. The main thing holding me back was all the rowdiness that goes on in the playroom.
The speeding dump trucks or roughhousing games would surely knock down an easel. Plus, I was pretty sure a picture frame style board would fall right off the wall.
I love the schoolhouse style chalkboards, so I decided to make an affordable DIY version I can stick right to the wall for safety, but that would look similar to the one I admire… for about $10! Post contains affiliate links.
I made the chalkboard happen with contact paper and an 80 cent furring strip! It was so quick and easy. I was skeptical at first if it would be durable enough, but it turned out great!
I love that the contact paper was a good solution. Partly, because it will be easier to take down if I need to rearrange things. Also, because this way, it was done in just a few minutes!
I think this is super convenient for renters as well, it makes for the perfect solution compared to chalkboard paint.
Kids Chalkboard Wall Supplies:
- Chalkboard contact paper
- 2 inch furring strip (cut into two 4 feet pieces)
- stain of choice (I used leftover Minwax Jacobean)
- finishing nails
I found a furring strip that was straight, and had Lowe’s cut it in half for me.

Then, I came home and gave the smooth sides a coat of stain.

Next, I cut the contact paper roll in two equal lengths just a little bit shorter than the four foot furring pieces. The grid lines on the back help to cut it straight!

Using a level and one of the furring strips, I marked a pencil line on the wall to be sure it went up straight.

Then, it was as simple as peel and stick! I applied the chalkboard contact paper directly to the wall, peeling a little at a time to get it on straight without any wrinkles.
If it was going on a little slanted, I peeled it off and realigned. The contact paper was easy to peel off and adjust to get it on straight.

I applied the next row directly on top of it to create the large rectangle shape.
Then, I attached the furring strip to the top and bottom of my contact paper chalkboard using finishing nails into the corner studs.
Once I seasoned the chalkboard, the seam was almost invisible!

The wood on the bottom works perfectly to hold a piece of chalk.

This was so super easy, and Wesley loves it!

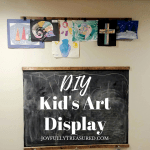
We also added a kids art display wall above the chalkboard!

Next, I hope to add a roll of butcher paper to the wall to pull down for coloring, along with some cups for chalk and crayons!
Do you have any fun playroom ideas to share?


Pingback: Painting Over Laminate Furniture, Contact Paper Bookshelf Makeover - Joyfully Treasured
This is such a great idea without having to paint the wall!!
Pingback: DIY Kid's Art Display Wall for the Playroom - Joyfully Treasured