These past few weeks, I’ve been painting over laminate furniture in the office and giving it a fresh makeover.
With another baby on the way, I am in organize mode! Our office is the biggest project on the list.
Our office is full of black laminate Ikea furniture. It worked great when it had a dramatically dark, masculine library-office look in the old house.
Now, between running the Etsy shop, being the family “secretary”, and working on projects, it has become “Mommy’s office”…and it is a hot mess!
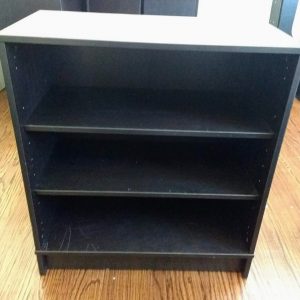
Since the laminate furniture we already have is still in good shape and super functional, I thought painting it would be a good solution.
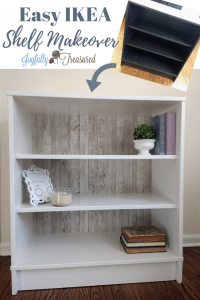
I saw a photo of a white bookshelf with a rustic wood back, and knew it would be the perfect way to update our laminate shelves, and get an affordable farmhouse look for my office! Post may contain affiliate links.
Painting over Laminate Furniture
Painting over laminate furniture made me a bit nervous at first, but I realized it is almost as simple as painting over wood!
The most important thing is to use a quality primer to ensure adhesion.
Typically, I use Kilz because it has never let me down as far as sticking to stubborn surfaces. Unfortunately, it smells strong for days so I try to only use it outside.
I used BIN shellac primer for this project, followed by a latex paint. The BIN still smells during application, but it is not quite as strong. Unlike oil based, it dries completely odorless!
The paint color I used is Sherwin Williams in the color Alabaster. It is a lovely creamy white color, plus I found a gallon of it for $9 in the oops paint at Lowes…score!
Supplies:
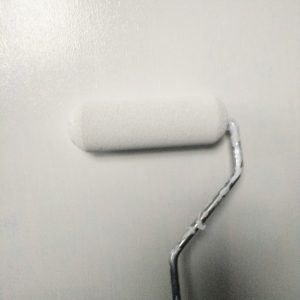
- Small foam roller and paint tray
- Paint brush
- BIN primer
- sand paper
- Latex paint
- drop cloth
- wood contact paper (I tried out this dark one, and this light one)
Process:
1. First, remove the shelves. Next, sand the piece lightly with a medium grit sandpaper. This is important, and I learned the hard way!

2. After sanding, clean the piece thoroughly and allow it to dry.
3. Using a small foam roller, apply one even coat of BIN primer.

You can use a brush to get to any spots the roller can’t reach. The foam roller helps to minimize brush marks and get a nice thin coat.
The shellac primer doesn’t wash out with water like latex, so I used a cheap disposable touch up roller and tossed it after use.
I use a mask while applying the primer, but within about a half hour, the smell dissipates completely.
4. After at least 24 hours, I applied the latex top coat. I used a roller again, with a brush to get in the nooks and crannies. To go completely from black to white, I needed three thin coats of latex.
5. Apply the contact paper backing. This was the part I was most excited about. The instant transformation from the contact paper is pretty addicting!
First, cut the paper just a little longer than the back of the shelf. Peel just the top six inches or so, and get that aligned and smooth to the top corner of the shelf backing.
Then, slowly pull off the rest of the backing and smooth down to the base of the shelf. I used a knife to gently cut a clean line at the base to remove the excess paper.
Lesson Learned
As always, I learned a couple things along the way. With the first shelf, I read the BIN can directions, and applied without sanding as directed.
The latex top coat seemed to adhere well. After a few days, I put the shelves in, I realized the shelves gouged the paint going in, and the paint scraped off! I have a feeling maybe the latex just hadn’t cured yet, but I wasn’t taking chances with the next shelf.
Of course, I had to try to get away without sanding…but in this case it was necessary!
To be safe, with the second shelf, I sanded the whole piece lightly before priming and had much better adhesion. The shelves went in fine!
The finished result is just what I was hoping for! Painting over laminate furniture and adding the fun backing was a relatively simple and affordable way to update the office!
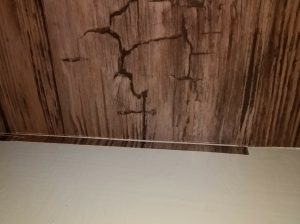
The two contact papers I tried were a rustic wood grain, and a lighter weathered barn wood. I decided I liked the lighter one better for the office shelves, but I took photos of both!
Here is the rustic wood contact paper:
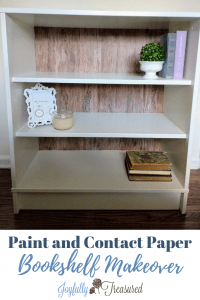
And the lighter plank one!
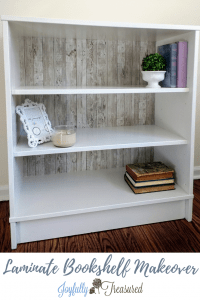
I love how both turned out!
Right now, I am working on another project that uses contact paper, this time a chalkboard for the playroom! I can’t wait to share it with you!
Related posts:
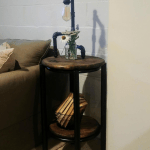 How to Spray Paint Metal Furniture, A DIY Makeover for Tables, Chairs and More
 How to Refinish a Table Top, Farmhouse Coffee Table Makeover
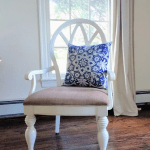 Painting Fabric on Chairs, How to Paint Upholstered Furniture with Latex Paint
 Painting Over Semi Gloss Interior Doors: Simple Prep Tips for Long-Lasting Results
I’m so grateful for your Instructions! I acquired this chair that fits me perfectly. Only thing is that there are deep stains on the arms. And I’m not fond of the bright orange color. Can’t wait to do this! So excited!
How do I paint over laminated cabinet fronts, doors and drawer fronts?
sand, prime and paint. I painted a laminate bath vanity doing this and it has held up well for almost five years
Thanks for the instructions!! Super helpful and your shelves look awesome!
I have a question though: Is there a certain amount of time you should wait between each coat of the latex paint?
Thank you in advance! 🙂
Hi Haley!
Thank you so much! 🙂 I waited a day between mine because I have a preschooler… and it feels like miracle just to get through one coat! However,I believe its fine to wait as little as an hour or two if the air isn’t humid and it feels dry to the touch. The back of the latex paint can should specify how long to wait for that particular brand!
Pingback: DIY Quote Art with Napkin Decoupage, Easy Dollar Tree Decor Craft Idea - Joyfully Treasured
Loved this, I have a dresser that is laminate, this is a great project to change the look.
Thanks for the great directions
Beautiful, I love your finished product. I was looking at my old mahogany looking laminate entertainment center and thinking what could I do with it? You just answered my question. Thanks for sharing. I love the effect you created and switching my wood items from mahogany to country white is the perfect scratch for my ‘itch’ to change.
I am so glad to hear this inspired you! I am sure your entertainment center will turn out beautiful!
Beautiful! I know you said these are IKEA. I have one from Walmart that I bought several years ago that I want to revamp. It looks exactly the same. But the back of it is a thin cardboard. Does that tack paper stick to that? I’ve never actually tried it but curious to know because I would love to use the shelf I don’t wanna waste products LOL
Hello Allie! The contact paper would adhere perfectly to the cardboard back. Just apply it gently, as it is not completely rigid. 🙂
I love your post j was wondering if you do strictly contact paper if you still need the primer and to sand?
The contact paper should adhere fine directly over the existing finish. I didn’t actually primer the areas where I applied the contact paper, and it is holding up great!