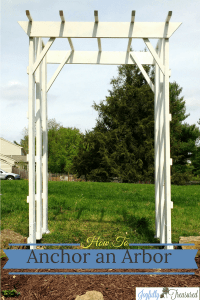
I was happy to find a pretty garden arbor on Craigslist. It was very sturdy, solid wood, and the price was right. Once Jason picked it up, I realized I had no idea to anchor it into the ground!
Our township requires permits to install an arbor with concrete, and I wanted the flexibility of being able to move it if we ever need to.
So, I went to Lowe’s and Home Depot, and I found that they no longer sell kits to anchor an arbor. No one had any ideas of how to secure it simply.
Luckily, I stumbled across Stately Kistch, who had the same trouble I did. She used fence mender posts. I found these at Lowes and purchased four.
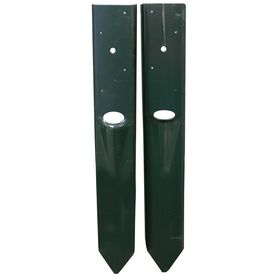
E-Z Fence Mender
Supply List for Anchoring a Garden Arbor (No Concrete Needed):
- E-Z Fence Mender Posts (4) – used to anchor each leg of the arbor securely into the ground. Can be purchased at Lowes or Amazon.
- 1 7/8″ Wood Screws – for fastening the arbor to the anchors.
- Impact Driver – to drive screws efficiently into the wood.
- Sledge Hammer – for driving the fence mender posts into the ground.
- Painter’s Tape & Newspaper – to mask off areas before painting.
- Deglosser – prepares the surface for painting by removing gloss.
- White Spray Paint – to match the anchors with the arbor’s color.
- Gloves & Old Sock – for applying the deglosser
Arbor Installation Process:
We hammered in the first anchor.
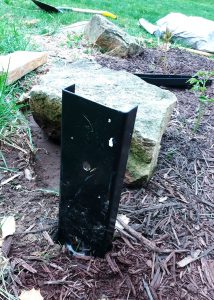
Arbor Anchor
Then we put the arbor down how we wanted it. Because the Simpsons Strong Tie has a nub on the side to hammer, we were able to hammer the anchors in without moving the arbor. This made it a lot easier to get it lined up just right. It was definitely helpful to have one person to hold the base of arbor steady while the other hammers in the anchors.
Once we had the anchors hammered down and the arbor situated, I screwed the anchors to the arbor using my beloved impact driver and 1 7/8″ wood screws.
Painting Anchor Posts to Match
After the arbor was installed in the ground, I taped some newspaper around the base with painters tape.

Next, I put on a coat of deglosser to make sure the paint would adhere well. I wore gloves and just used an old sock to wipe it on.

Finally, I used white spray paint so the anchors would match the arbor. Now you can hardly tell they are there.

I’m so happy to have found this way to install an arbor. I can’t wait to see it full of clematis and morning glories in a couple months. Eventually, I will install stone steps through the garden to walk up to the arbor.
There is still a lot of work to do in this garden, but it has already come a long way. The weed trees were taller than I was after we moved in last Spring. Talk about overwhelming! I know this garden is happy to be looked after again, so it is all worth it.
Do you love garden projects? You might enjoy one of these tutorials!
- DIY Solar Fountain
- Dollar Tree Garden Cloches
- DIY Solar Chandelier
- Solar Mason Jar Lanterns
- Simple Method for a Weed Free Garden


These are great instructions. Thanks for sharing on To Grandma’s House We Go!
Pingback: Outdoor Solar Chandelier DIY, Upcycled Trash to Treasure Makeover - Joyfully Treasured
What is the width of the arbor post you attached these to? Mine are 4″ wide abs was hoping yours were the same.
Yes, my posts are also 4″!