Horray, it’s reveal day! (Or in my case, reveal night after the kids go to bed!) The challenge is to take just three weeks and $100 to completely transform a room. The room I selected is our dated 1960’s powder room.
This was such a rewarding challenge. The budget was not quite as big as my imagination, but I’m so happy with how much we tackled!
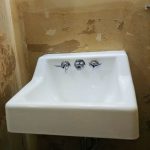
Here is a look again at where we started three weeks ago…my yellow and green 1960’s time capsule.

And here is the powder room today!

Lets look back at the goals from week 1 and see how it all came together. Post may contain affiliate links.
Remove the Wallpaper and Paint:
This turned out to be the hardest part of the whole challenge! The wallpaper was attached to raw drywall, so most of the drywall paper ripped off with the removal.
I spackled my heart out, but the walls are not totally smooth. (I never want to do that again!) Even with my spackling struggles, I still think it looks a world better.
Update the Sink:
I used the Rustoleum tub and tile kit on the sink to make it a nice neutral white. You can check out the tutorial here.
We used two small pieces of scrap butcher block we had in the shed to put together a countertop. It worked out that there is only one small visible seam in the front. I love that we found such a great way to use those scrap pieces!
I wanted to seal the counter with dark tung oil to match the kitchen butcher block, but realized I was all out of the oil. I definitely didn’t have the budget for more, so I ended up using a stain we had in a similar hue.
The sink skirt was an old curtain I had that was stained with paint. I cut it down and hemmed it with an old bottle of liquid stitch I found in my sewing tin.

Shiplap Accent Wall and Open Shelving:
I bought the shiplap boards and had them cut at Home Depot. The cuts weren’t completely precise, but with a little caulk it looks clean and finished.
I didn’t paint the shiplap due to time and budget. Even so, I think it looks great in primer white!
The open shelving came together for less than $20! I found these wonderful shelf brackets on Amazon, they even included screws and anchors.
The three shelves were made from a 6-foot board from Home Depot. It was one of the easiest projects in the bathroom, and I am loving it!
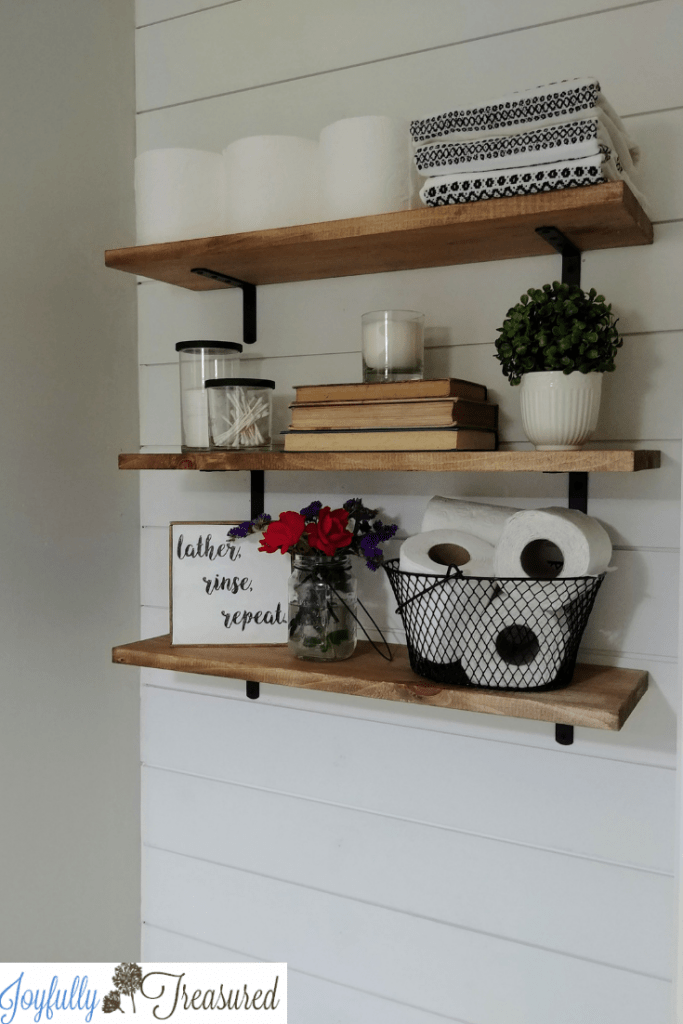
The bathroom sign is a craft made from a dollar tree sign. So perfect for a small budget!
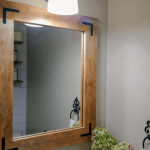
Replace or Update Mirror and Light Fixture:
We bought a glass cutter, and cut down a sheet mirror that used to hang in our master bathroom. We mounted it on the wall, and glued on this wood frame.
I’m so happy we got to this project, because I had a bunch of L brackets from some temporary balcony baby proofing when we first moved in. I have been wanting to use them for something, and this mirror seemed perfect!

I had this light fixture leftover from years ago when I was buying things on Craigslist for the kitchen remodel. Im so glad it fit in this bathroom!
It feels a little like cheating that I have a light fixture just lying around the house…but this was just $10! You can get some amazing fixtures on yardsale sites, or with some spray paint.
Speaking of spray paint, I spray painted everything from the toilet paper holder, to screws and brackets, to mason jar and candle jar lids. My husband had a can of flat black spray paint in the garage, and I put it to good use.

I had so much fun with this challenge, and it reminded me that I have way more to work with than I realize. Our shed has plenty of half used paints and boards and random hardware. Sometimes I forget it is there and just run out to buy new.
Here is what we spent on the $100 Room Challenge:
- Rustoleum Tub and Tile Kit: $23.68
- Spackle:
$7.45$13.03 (We needed even more!) - Shiplap: $26.93
- Wood from the Restore: $1.60
- Wood for shelves: $9.38
- Paint brush: $1.00
- Basket: $1.00
- Sign: $1.00
- Finish Nails: $2.03
- Glass Cutting tool: $3.36 (we had one, but can’t find it anywhere, ugh!)
- Shelf brackets: $9.10
- Paint: $-6.00 ($15 rebate on $9 can of oops paint!)
- Brackets for butcher block $4.00
- Wood putty $4.49
- Tension Rod $2.97
- Screws $1.26
Total: $98.84 if you count the $6 paint rebate bonus!

Check out the other weeks of this challenge below!
Many incredible bloggers transformed their spaces for this challenge. See the link up below for some amazing inspiration!

Pingback: DIY Dollar Tree Decor Craft, $1 Farmhouse Bathroom Sign - Joyfully Treasured
Pingback: How to Paint the Bathroom Sink, $100 Room Challenge Week 2 - Joyfully Treasured
Great job! You win the prize in my book out of all the $100 Bathroom Remake challenge. Love the mirror frame, the light paint (much better than wallpaper) and the shiplap brings this bathroom right up to date. The open shelving looks wonderful
Thank you so much Barbara! You totally made my day!
Joy your bathroom came out so darn cute. Love every little touch you placed in there. Looks like a professional did it. Great job!
Thank you so much, Terrie! Your bathroom looks gorgeous.
Wowza, what a beautiful transformation! The shiplap wall and skirt around the sink have to be my faves but even the accent pieces are so cute. Great job! Enjoy
This bath transformation is amazing and I can’t believe that is the same sink. I love everything you have done with this room. I also have had that same problem with removing wallpaper and I know it is a hard job.
Thank you so much, Sherry! The sink is my favorite part, because I was unsure at first how to update it for under $100!
I love it! The wood pieces really warm up the space while the shiplap wall adds some character. Hope you enjoy your “new” bathroom!
It looks lovely! Everything looks so intentional and well thought of! My favorite things are the new wall color and the updated sink! I love that you showed how to use your cute, existing sink, and gave it a whole new look!
Oh my gosh I love every piece of this makeover! The sink surround is so cute, and the shiplap and shelves are perfect. I can’t believe you triumphed over that wallpaper! It looks so pretty in here now, great job!
Wow! That is a HUGE change! I LOVE what you did with the sink (both restoring it to a white and adding the butcher block. And the mirror looks SO good. Isn’t it wonderful to use up stuff you have lying around. So often we forget to that we have so many things already on hand. I am so glad you took on this space for the $100 Room Challenge this month. You did an amazing job!
Wow I cannot believe how well that sink makeover turned out!! I would have sworn you bought a new one…..excellent job!
Pingback: Simple Ideas for Small Hallway Decor - Joyfully Treasured
Pingback: Amazing $100 Room Makeovers: Part 4 - Lemons, Lavender, & Laundry
Wonderful job! We are redoing our main bathroom, house was built in 1850, added onto in 1870 and a second floor in 1900.As you can imagine we are running into some unique problems. The bathroom has only a crawl space under it and we are redoing the plumbing ourselves. (No self respecting plumber would be interested). I will be refinishing a clawfoot tub to put in the bathroom. 220 was run to put a dryer in the bedroom and a washer in the bathroom. They cut the sill plate at the bottom of the wall and took out several feet of board, the worst part is they also cut out some of the Joist, this wall also backs onto the Kitchen which had a fire some time in the past. t was remodeled some time in the 1950’s and they used some of the chard wood from the kitchen and put up mason board over it. Two of the walls are outside walls, house is brick double walls finish is cement over lath, the other 2 are plaster over lath. We also had to replace the wood around the window, used left over mop board from a refinish in the kitchen of the school I live in part-time.
Oh my goodness, a house that old endless quirks yo work around! The lath walls alone sound tricky, let alone the rest! I hope it all comes together soon enough, and you can get some much needed relaxation in your remodeled bathroom!