Put together deck railing planters quickly and affordably with simple adjustable brackets. Plus, keep planter boxes moist with this one strange trick!
We had a family barbecue a couple weeks ago for our little guy’s second birthday. I decided to spruce up the deck before the cookout by doing a little project that has been on my wishlist…some deck railing planter boxes!
Lowes had everything I needed, and I put these railing planters together in about an hour while my husband took the kids to pick up Friday night takeout.
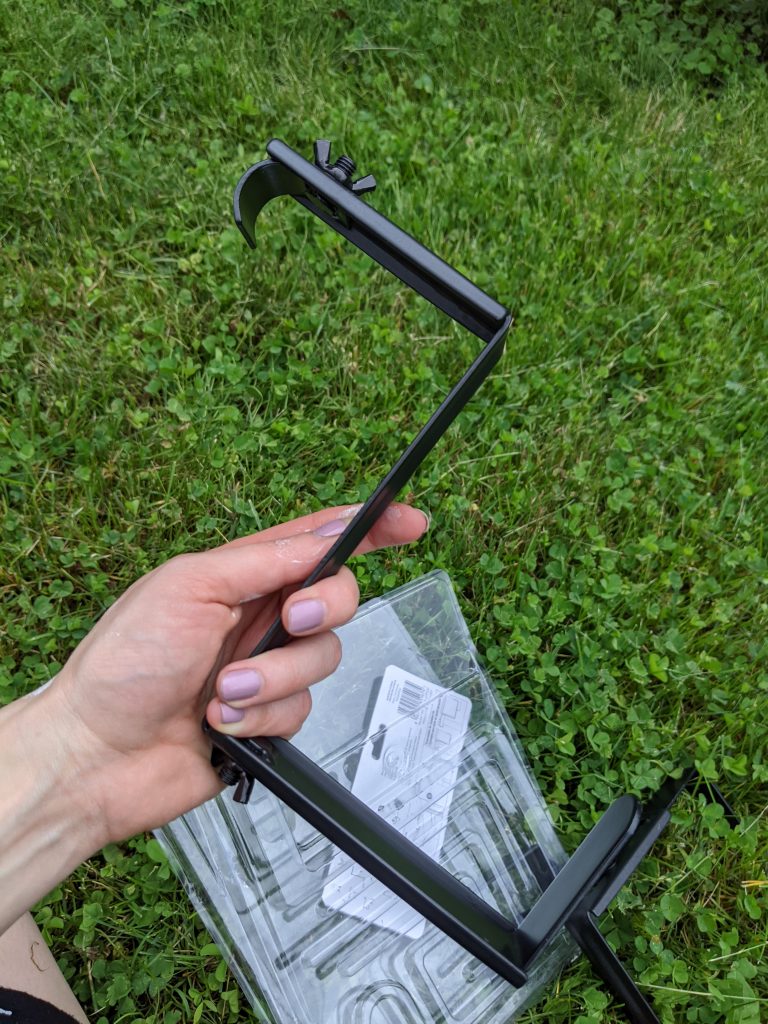
Railing Planter Brackets
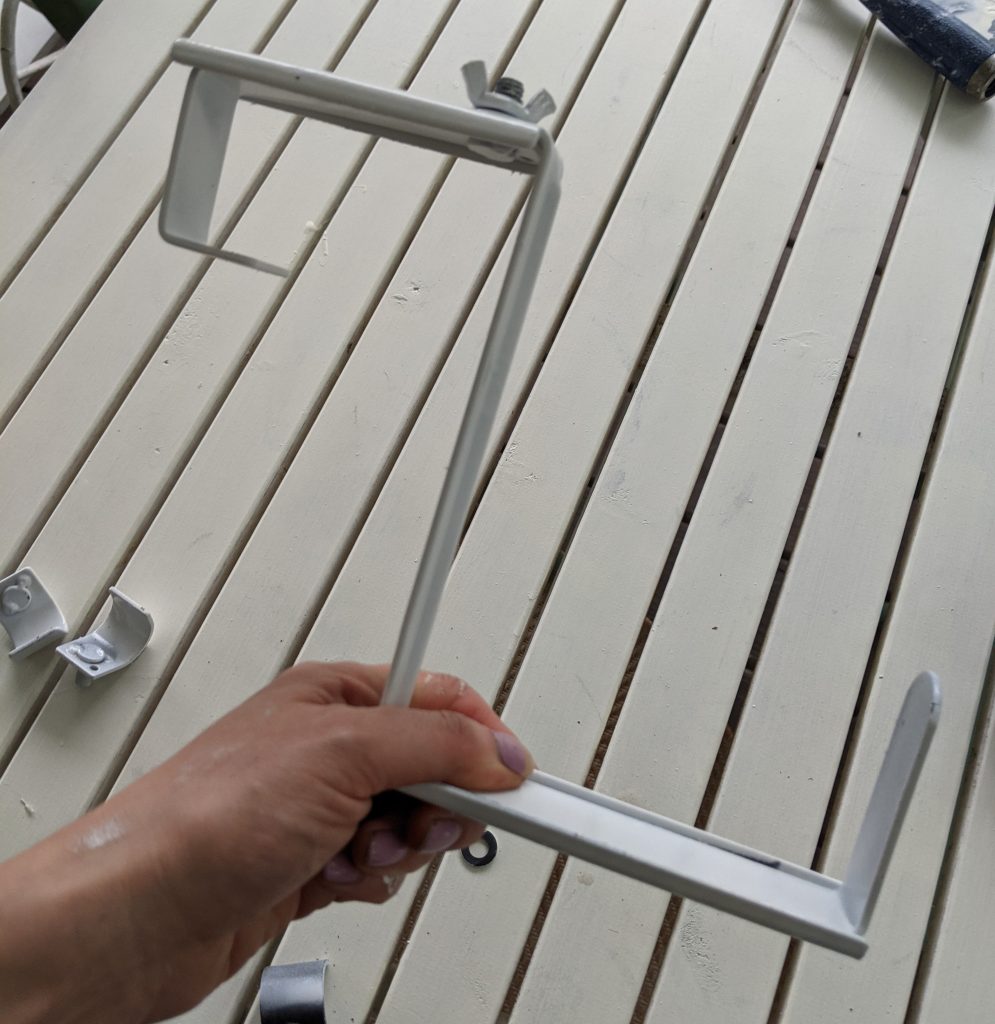
These brackets for railing planters are a great value. The metal is very strong, and I can tell these will last for many years.
They were $10 per pair at Lowes. They are available on Amazon and at Walmart as well, but Lowe’s was the best deal the day I went. I appreciate that these brackets are adjustable, and have two hanger types to choose from, so you can get a tight fit around your railing and your planter no matter what size they are.
In the picture above you can see the smaller curved hanger, ideal for a small metal balcony railing. Below, I have them assembled for a larger wood deck railing like ours.
I spray painted the bracket pieces white to blend in with our railing before I assembled them. You can also find them in white, but black was in stock at my store.
While the brackets were drying, I put together the planter boxes. These are basic sage green plastic window box planters from Lowe’s, I believe they were $7 for the 24 inch size.
Add Drainage Holes
Before potting the railing planters, I created the drainage holes in the base.
To make the holes, I just took a wood screw from the garage and a screwdriver and screwed in,then pulled the screw out to create holes where I wanted them.

Something else I use when I have to make a whole bunch of drainage holes, is a cheap wood burning tool. It will put a hole in plastic pots quickly and easily. It is such a lifesaver when using a bunch of gallon jugs to start plants in the winter!
Add…Daipers?
Before my boys, I might have thought I had a bit of a green thumb. In retrospect…I think it was just making the time to notice and care for plants.
Now…I never forget to feed and water the children! But, my potted plants frequently get underwatered.
Crazy as it sounds, I heard that adding diapers in the base of pots helps plants stay moist for longer. Ever since reading about it, I have been wanting to try it! So, I placed two diapers along the bottom of each planter.

Then, it was finally time to add the flowers! Luckily, I found flowers on clearance that day. It was the perfect budget-friendly score to divide and plant into the window boxes, because buying annuals sure can add up!
I grabbed two 1 gallon mixed planters of wave petunias, mixed with some variegated vinca and verbena. Once the railing planters were filled, it was time to try put these railing brackets to work!
Here is one of the planters just after planting with clearance shelf flowers.

Now that it has been a few weeks, I can honestly say the diaper method seems to work! Here are the planters this morning when I was taking a picture of our little backyard companion.

I can go several days without watering these boxes and they are still blooming profusely. They look better today than the day I first planted them.
Sometimes, the simplest project can be the one to add the most cheer to your day. I love these little planters so much. I like to pop out with my cup of coffee and deadhead the flowers whenever I can sneak a peaceful moment.
Have you made any little changes in your home lately that have brought you joy? I would love to hear about them!
If you love a fun garden DIY, you might enjoy this DIY solar fountain planter!


