I love blue and white chinoiserie vases and jars. I think they look beautiful on the mantle, but seeing as they are around $100 each, I just couldn’t justify the splurge right now!
It had me wondering if there was an affordable way to have those blue and white vases, other than getting incredibly lucky at a thrift store someday.
My crazy solution was to try to decoupage vases with a pretty paper to create a similar look. So, I went on the hunt for the perfect paper. I first tried the craft store, but I couldn’t find any paper that would work!
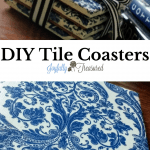
Pinterest showed me that napkins are frequently used to decoupage, and that’s when I found a beautiful napkin design on Amazon. My first experiment was making these tile coasters. When that went well, it gave me the confidence to move on to the vases! 🙂
Decoupage Vases Materials
- white spray paint
- blue and white cocktail napkins
- small paint brush
- plastic wrap
- scissors
- Mod Podge
- acrylic spray sealer
Here are the large thrift store vases right after they came home from Goodwill.

The first step was to clean them and let them dry.
Next, I spray painted them white with a basic spray paint and primer. There is no need to be perfect, as the paint is simply a base to decoupage over. I already had Rustoleum paint and primer on hand from another craft.
The vases took a few rounds of painting, as I had to turn them a few different angles to get the entire vase coated.
Then, I just went crazy decoupaging!
Separate the ply of the napkins you want to decoupage with down to one ply. My napkins had three layers, so I had to peel off the bottom two.

Then, I cut the napkin to the size I wanted to work with. I cut it in half to put the pattern around the center of the vase without having to contend with as many curves.
To start, I painted the mod podge directly on the vase, and used plastic wrap to smooth the napkin onto where I wanted it.

The plastic wrap would have been a good idea to use the whole time, because the napkin will tear pretty easily if you brush too much over one spot. I just cut tiny pieces to fill in over any parts I accidentally brushed off.
Once I got going, I just stuck the napkin onto the vase and painted the modpodge over the top with the brush. I did all but the bottom section of both vases first and let it dry.

Then, I flipped them over and finished the bottom.

I’m going to let my mod podge vases cure a few weeks, then seal with mod podge acrylic spray sealer.
I plan on using them for both fresh and faux flowers, so I want the outer decoupage to be able to handle getting wet now and then!

As I was applying the napkin, I realized that anywhere the napkin layer majorly overlaps, you can tell the section is darker. I think a more skilled “decoupager” (that really ought to be be a real word!) than I could make these so flawlessly you wouldn’t guess they weren’t ceramic even up close. However, mine look the most convincing from a small distance.

That said, I am thrilled with my new blue and white decoupage vases! They are large enough to fill the empty void on the mantle, and for just a few dollars! I thought they were surprisingly easy to make too.
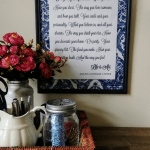
Are you interested in more ways for using napkins in decoupage? Check out these tile coasters, or this DIY quote artwork!
Decoupage is such a fun medium with so many possibilities! Do you have any fun decoupage adventures to share?


Gorgeous and you inspired me to try with an old vase I have! I have always been afraid of decoupage but I guess that is silly since I am not using the vases now anyway!
You should totally give it a try! I was nervous about decoupage too, but it was really easy and fun to do with the napkins! 🙂
Very nice!
Don’t be afraid of doing decoupage . Since Mod Podge is water soluble if you aren’t satisfied on how your project is advancing you can remove the offensive material ( paper and Mod Podge) with water and a soft cloth while it is still wet and start over.
I decoupaged three serving plates of different sizes that I hung on my dining room wall . After tiring of the display I cleaned the plates carefully so as not to damage the decoupage ( on the back of the glass plates so the design shows through) . I now use the plates to serve appetizers and desserts. I hand wash the plates carefully so as not to damage the decoupage on the back) Never immerse them in water.
Thank you Norma! That is such useful information. I love the idea of removing the front decoupage, so it still shows though the back of glass plates.
I have never done decoupage. Is is as easy as you have posted, or should I get a How To book on it. I am a little clumsy with small projects.
I had never done decoupage either until recently. It really was simple! If I felt I messed up, I just removed that part, or layered over top of it. 🙂
What a novel idea! Like you said, looks great from a distance and I see where you were going with that look. The vases looked realistic! Job well done!
Thank you so much, Becky!
Pingback: DIY Quote Art with Napkin Decoupage, Easy Dollar Tree Decor Craft Idea - Joyfully Treasured
Pingback: Decoupage Vases with Napkins, Blue and White Chinoiserie Vase Inspired Makeover | Dadne
Beautiful!
Pingback: Decoupage Vases with Napkins, Blue and White Chinoiserie Vase Inspired Makeover - Joyfully Treasured | Dadne
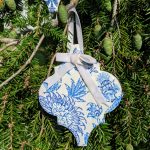
Pingback: Arabesque Tile Ornaments, DIY Handmade Christmas Ornaments with Decoupage - Joyfully Treasured
I would love to watch some of your videos if you have a neon decoupage in vases my information is below.