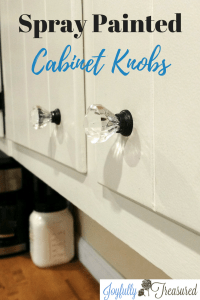
Trying to beautify an entire house with a limited budget means doing whatever we can to make the money go as far as possible. I thought of all sorts of ways to save on our kitchen remodel, and one of them was to spray paint cabinet knobs! I dreamed of having real crystal knobs in an oil rubbed bronze finish something like these, but they just weren’t in the budget. Sadly, even the glass knobs in oil rubbed bronze finish were quite expensive. Post contains affiliate links.
Then, I found a great price on these simple chrome knobs on Ebay. I figured I could just tape them off and spray paint them. Hmm…paint cabinet knobs? For under a dollar apiece, it was worth a try!
How to Spray Paint Cabinet Knobs:
If your knobs need only need paint on the bases like mine, tape the knobs off carefully with painters tape. Next, wipe a little deglosser on the surface to be painted.

Next, it is time to paint! To prevent overspray, put them in a box and spray in light coats, turning them in between each coat of paint. I used Rustoleum Universal All Surface Spray Paint oil rubbed bronze. I love this metallic paint because it has an easy spray handle, plus it is a paint and primer combined.
3. After the paint had a couple days to dry thoroughly, remove the painters tape.
Jason cut the bolts down to size with bolt cutters and installed the knobs on our recently painted cabinets. At first, I tried to cut them myself, but it takes some serious muscle to cut the hardware with bolt cutters!
I think the knobs look lovely.

Who doesn’t love some sparkle in their life? 🙂
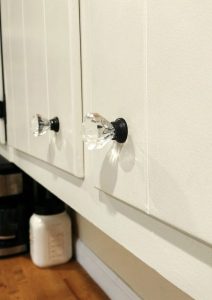
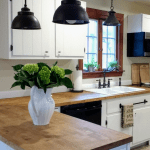
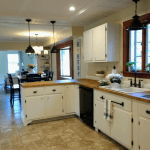
They help me put the “Chic” in my farmhouse chic kitchen.

We installed them six months ago, and they are holding up very well. I couldn’t be happier with the result! I use this same method to create crystal knob finials for my DIY curtain rods! These cheap little knobs can also be found around our home on top of candle jars and diy garden cloches. I could put a faux crystal knob on just about anything…it may be an addiction.
Have you spray painted anything interesting lately?

Pingback: DIY Conduit Curtain Rods with Glass Finials and DIY Curtain Brackets, Create a Gorgeous Look that Matches Your Decor for Less! - Joyfully Treasured
Pingback: Our DIY Kitchen Remodel Before and After, Tackling a Farmhouse Kitchen Makeover on a Budget: Part 1 - Joyfully Treasured
These are beautiful!
We’re giving our home a bit of a makeover with new flooring and a fresh coat of paint on the walls so in keeping with our very limited budget, we decided to DIY everything that we possibly could.
I decided to give our 2 livingroom table lamps an update to match with our new color scheme (from light pine laminate flooring to light grey laminate flooring and from light beige walls and trim to light/semi dark grey walls with crisp white trim).
I spray painted both lamps with a silvery chrome metallic paint and then painted the bases and the old stained shades with black chalkboard paint because I had 1/2 a gallon left from a previous project.
During this quick and easy lamp facelift, I actually misplaced one of the original decorative pieces that fastens the lampshade to the top of the lamp itself.
After searching the area I was working in for what seemed like an eternity, I got an idea.
I got 2 ping pong balls from the garage and spray painted them with the same chrome paint I used on the lamps. When they were dry, I made a little hole in each one and screwed them right on where the old ones were.
I love the new look and no one would ever guess that these fancy new toppers were once used in our Annual Beer Pong tournament!
That is genius, am sure it looks even better that way. Your lamp makeover sounds gorgeous!
I love the new colors for your living room, I bet it looks amazing! Happy DIYing! ❤