Hello and Welcome! Today, I’m sharing more about our crazy six month long kitchen remodel on a budget.
Part 1 was all about managing our kitchen remodel on a budget through DIY projects and shopping for affordable materials. This post is about changes that were well worth getting help with from professionals, as well as what we learned working with contractors.
Kitchen Remodel on a Budget: Splurge Worthy Changes
We knew we would need help with our budget remodel. Some parts we planned for, and others because we made discoveries along the way and decided it was best to call in a professional.
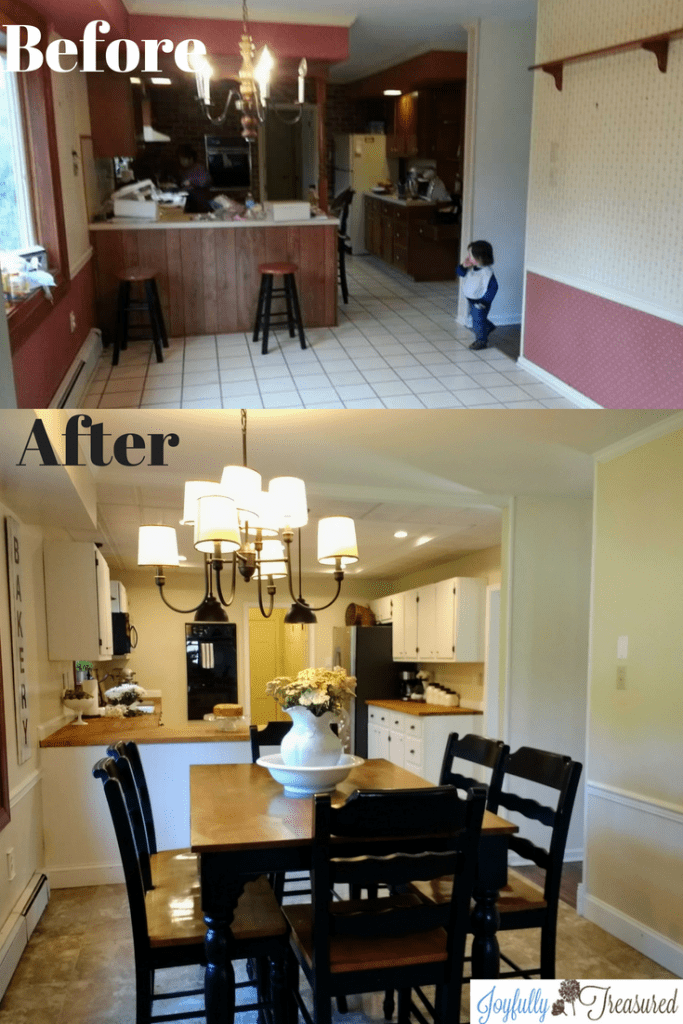
Opening the Floor Plan: Definitely worth it!
Our kitchen had two closed doors and one narrow doorway. The closed doors and narrow entries made the otherwise spacious kitchen feel dark and secluded. We had two doorways widened and removed one door, and it completely transformed how the space feels.

It brings in so much more light, and made the kitchen feel connected to the rest of the home. This was on our “must have list”, and the cost was so reasonable considering the huge impact it made.
Upgrading the Lighting
In the book Affordable Remodel, the author makes a convincing point that even on a tight budget, adding ample lighting is a high impact upgrade well worth it’s cost. I really enjoyed the book, and I couldn’t agree more about lighting! Adding better lighting was another change that transformed our kitchen.

We hired an electrician to reroute the wiring from the old soffits, and add LED recessed lights and new light fixtures. This was another splurge worthy expense in our kitchen. We have a dimmer switch for our recessed lighting, which actually comes in handy to adjust the lighting depending on the task. Decorative light fixtures add practical task lighting, as well as style and personality! They are an inexpensive way to add some wow to a kitchen. I always notice light fixtures when I look at photos of beautiful kitchens.
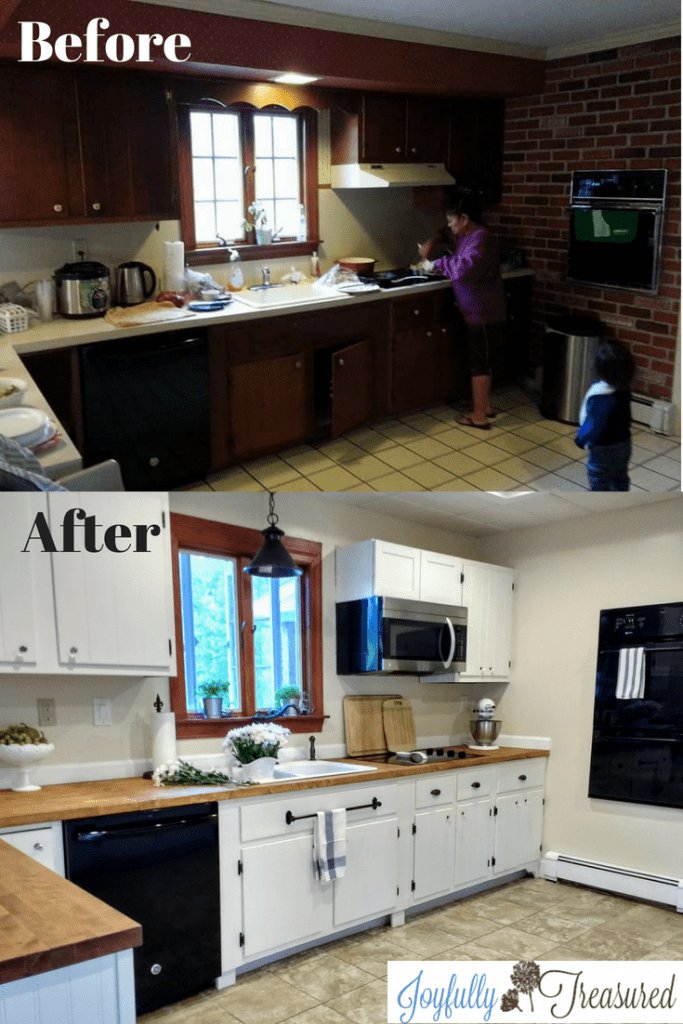
Replacing the Flooring
We had every intention of doing the flooring on our own. We tiled the floors in our old house, so we were sure we would do the flooring in our new kitchen also. As we ripped up the many layers of linoleum flooring and lauan, we had an unpleasant surprise. Our sub-floor was very thin, warped, and bouncy. It needed to be reinforced at all the seams. We were worried to try to fix it on our own and end up with a cracked floor within a few months.
This was a great example of the most important thing we learned about remodeling: just go with the flow! When we had the sub floor looked at, we learned our home would also benefit from extra reinforcement beams in our basement. It’s stressful finding more things that need taken care of in the middle of a remodel, but it is so much better knowing for sure. This way, we had it done properly from the start and will not end up ripping out our hard work later!
We had a 13″x13″ porcelain tile installed from Floor & Decor. If you live near one, I highly recommend checking them out for an overwhelming number of affordable tile options! We grouted with Power Grout in Sandstone Beige. I always like using this brand of grout from Lowe’s because it doesn’t need sealing and is stain resistant.
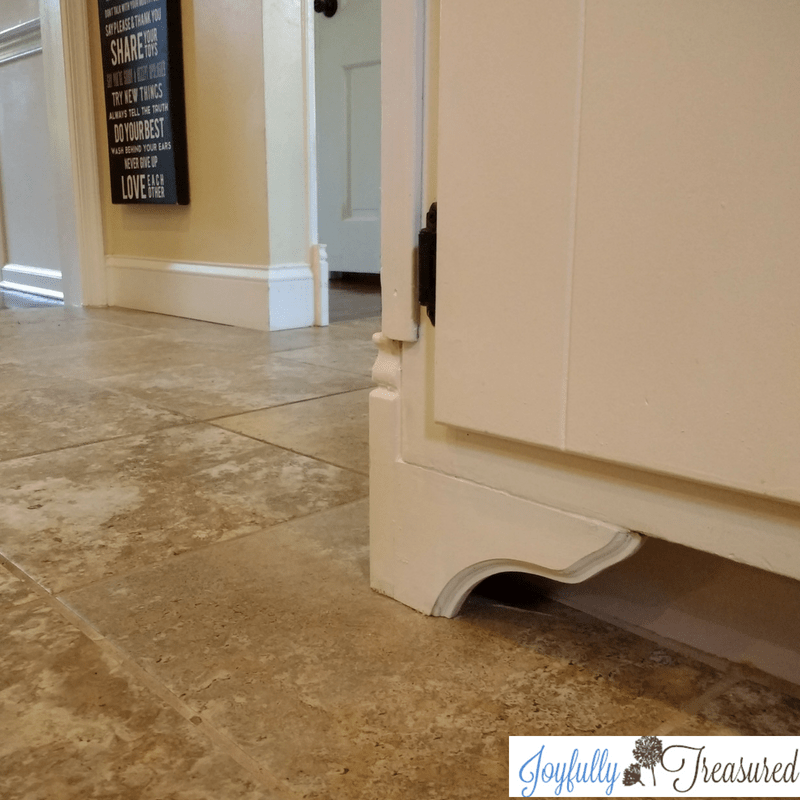
It is a pretty transition to have the tile in the kitchen and hall, coming in from the hardwood floors in the rest of the house. It has a ton of color variation, which gives me mixed feelings about how it hides dirt. I have to pay attention when cleaning them, but when I have an unexpected visitor in the afternoon, and haven’t swept up the crazy crumbs from our three-year-old’s lunch…I am so grateful to have this tile! 😉
Our Decorative Ceiling (Completely by Accident)
We really wanted the soffits gone because they made the ceiling feel so low. We originally planned to sheet rock in place of the removed soffits. When we went to tear them down, we learned that the wiring for the whole house ran through them!
To make matters worse, we ended up having to have access available to parts of this area to stay compliant with code. Our solution was to get help installing a coffered style ceiling with decorative drop ceiling tiles. This allowed there to be just a couple inches of space to remove a tile if needed, and I actually find it more beautiful than a simple sheet rock ceiling. At the time it felt like a calamity, but it became a unique feature that I regularly receive compliments on.

What we Learned Remodeling With Professionals
I learned a few things with our first big wave of remodeling. The first and most obvious is to know you are working with the best professionals available. Unfortunately, I learned this the HARD way!
Be Thorough and Check References
I used Home Advisor to find the first electrician we used for our kitchen, and was naive about the process. We assumed any electrician would do great work on Home Advisor. After getting three estimates, I hired and paid cash as the work was completed. I never asked for a copy of licensing or references. The work the electrician performed, while technically to code, was part of the issue that caused our need to modify our plans for the kitchen ceiling. When I addressed the issue we found, he just disappeared!
I learned to thoroughly check out any potential hires, and ask for several references. Ideally, I try to find reliable professionals through a friend, family, or coworker recommendation. This has worked out well for us, as we are sure of the quality of work. Plus, we know we have a recommendation we trust. We found a wonderful contractor to help us with our kitchen remodel through a coworker, and have since recommended his work to several of our friends. In this way, we also found a reliable and kind electrician going forward to help us whenever we need it.
Being Our Own “General Contractor”
If you learn from my debacle and hire contractors that come highly recommended, hiring your own professionals directly saves thousands. With a large remodeling company, there are office staff, general contractors, estimators, and advertising budgets. Large contractors can be a convenient choice if you don’t wish to be involved in the nitty gritty details of the remodel. However, it is only natural that the customer pays more for all of the overhead.
We knew what we wanted for the kitchen and how it would come together. I think it makes sense to hire small for any budget remodel. We had a large remodel done on our upstairs bathroom when we moved in. By going with small, reliable contractors, our cost was less than half the estimate of hiring a large company to manage everything.
If your not sure what is best for your remodel, get several estimates and see what feels right for you! Estimates are typically free, and a great tool in budget planning and learning more about the scope of the project.
For Several Small Jobs, Hire in “Bulk”
We did the majority of the work we wanted to handle on our own first. Sometimes, something unexpected cropped up that we couldn’t DIY after all. This way, we were able to add that to the list of things we wanted professionally done. We wrote down all the changes we wanted, and addressed all the little details together as one estimate. There were several very unconnected jobs to be done, but having the work completed as one larger job kept the costs lower than a few odd jobs spread apart. A contractor often charges less per day for a larger job than a small one because even just the estimate and planning take valuable time.
I hope this makes a little sense for anyone looking to do a kitchen remodel on a budget. We prioritized what we wanted to accomplish with our remodel and made a plan that maximized our budget. By combining DIY changes with contractor help, we were able to get the kitchen we wanted at a cost we could afford.