Learn how to hang a poster without a frame in the easy DIY! This affordable poster hanger with velvet ribbon is a fun and affordable way to hang large scale wall art on a budget! The best part is, it’s easy to tailor to your decor style!
We had this Irish blessing printed as an engineering print for just a few dollars at Staples, and I finally got around to getting it on the wall!
After realizing the frames I liked were super expensive, I started pondering how to go about hanging a poster without a frame.
A diy poster hanger seemed like the perfect little project to finally hang it! Post contains affiliate links.
The poster hangers I found for purchase were quite simple, so I thought it would be fun to make one, and jazz it up a bit with decorative trim, gold paint and velvet!
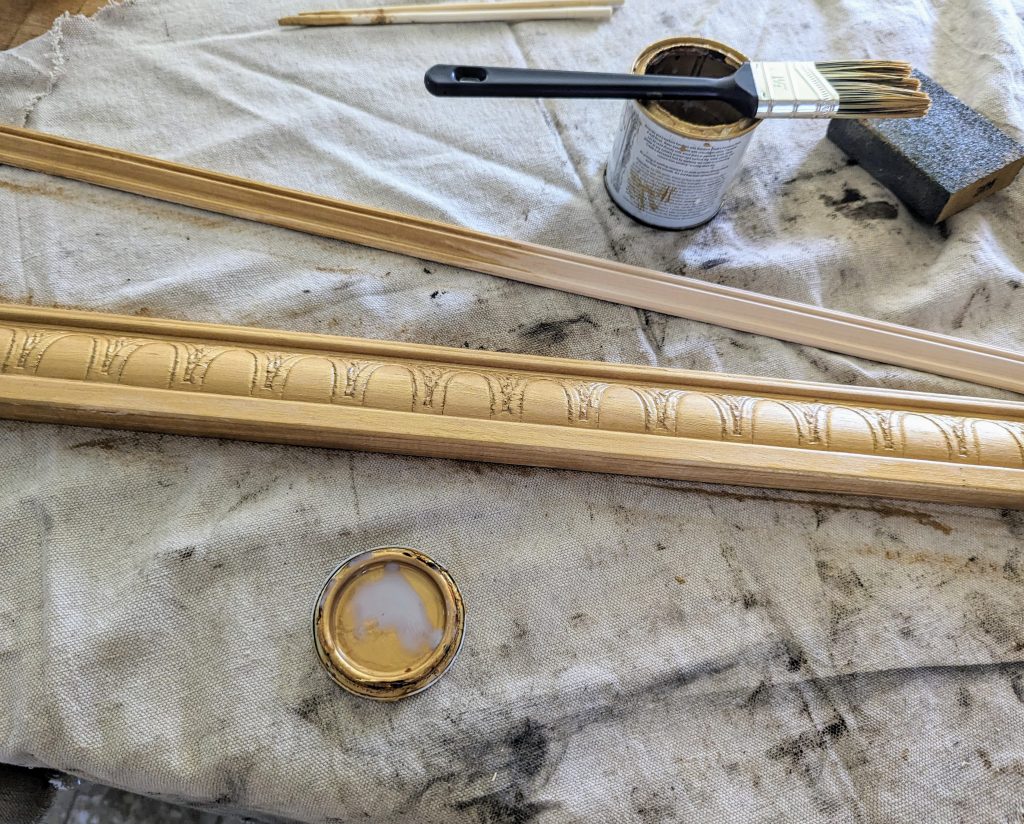
Using by the foot cut trim from Home Depot, this was incredibly quick to make, and adds so much character to DIY poster art.
Supplies
- moulding for top and bottom
- 1.5″ velvet ribbon (or preferred ribbon or cord)
- paint or stain (I used some leftover gold paint with dark wax)
- hot glue
The detailed tutorial is below, but I also quickly summarized the steps for this hanger, and the tea staining in a quick video!
How to Hang a Poster: Assembly!
After looking at the options, I found hot glue to be easiest for this
project. I thought about magnets, but on a large poster I didn’t want to worry about them being strong and secure enough, and I don’t plan to switch out my poster regularly.
1. Measure art, and cut trim to size.
My print was standard poster size 24″x36″, so I cut my pieces about 26″ wide. Home Depot allows you to purchase trim by the foot, so I was able to cut them both to size in store. I will go for 25″ if I do this project again, as the 26″ seemed just a touch too long on my finished project!
2. Paint or stain trim
I used some leftover gold paint and wax I had from other projects, but you could also use an affordable craft paint or wood stain! After the gold paint, I wiped a coat of dark wax to give the gold color a slightly aged look.
3. Secure poster
I attached my poster to the top and bottom frame pieces with a line of hot glue. If you want to remove your poster regularly, you could opt for small screws as well!
4. Attach velvet
Next, I attached the velvet to the back of the wood using the simple flat headed thumbtacks and a small hammer.
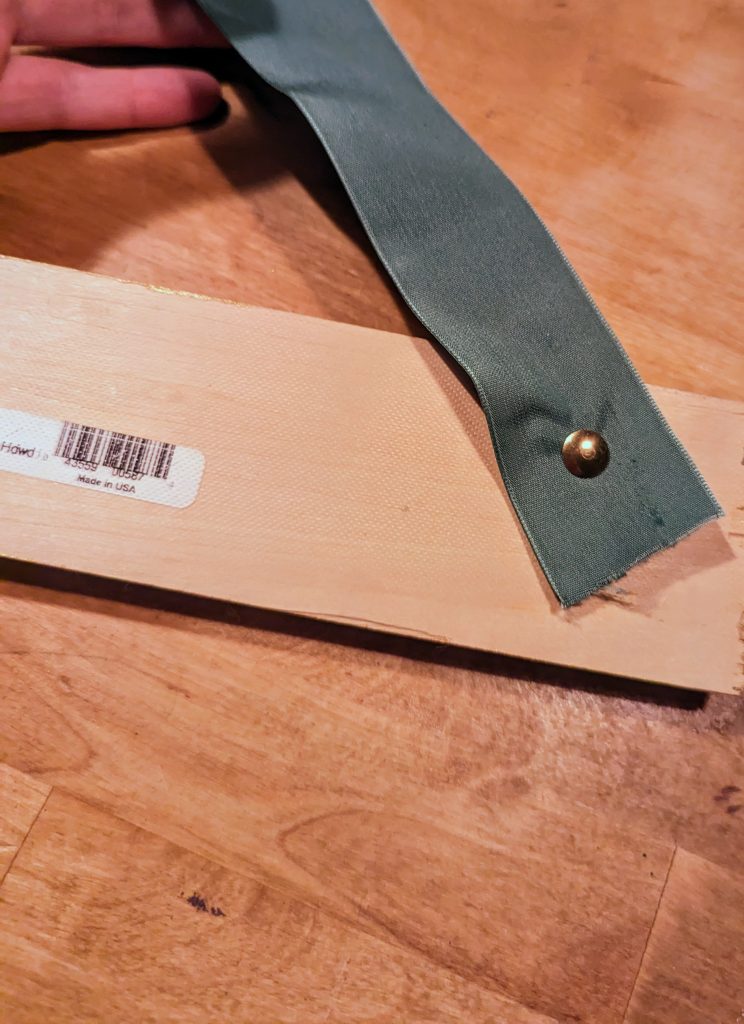
I attached a piece of velvet on each end, then tied in the middle to make a bow. If using a cord or twine, you could just attach one long piece to hang.
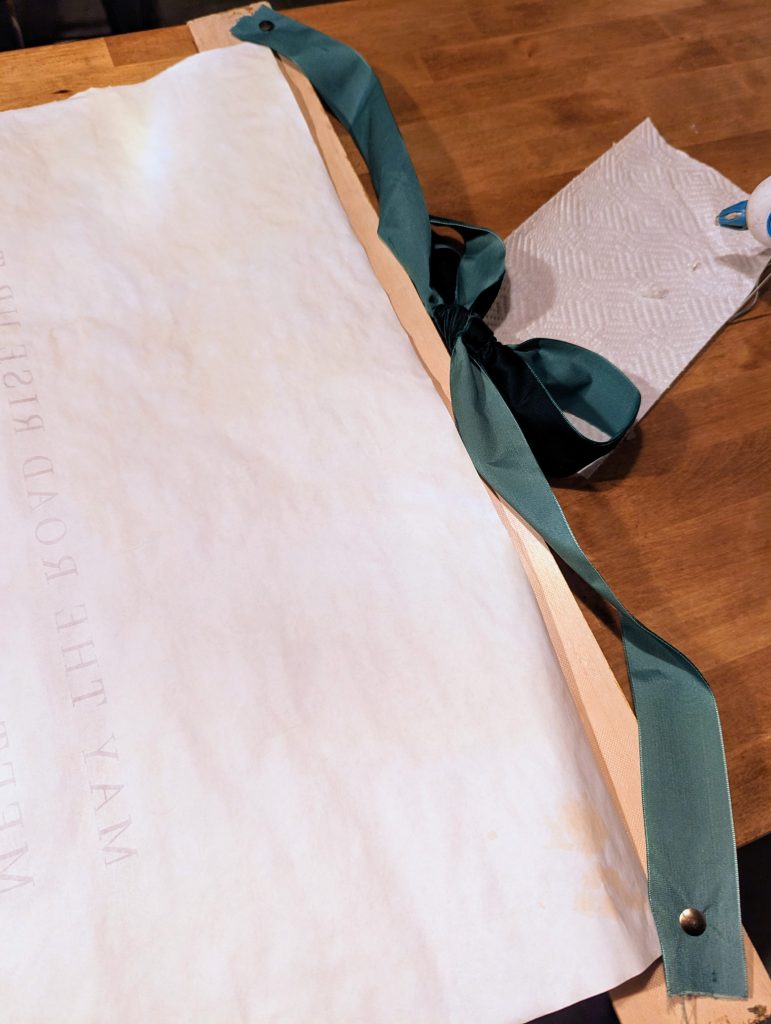
Now, our poster is ready to hang! I hung the poster art on the wall.
Here is the finished Irish blessing poster! The poster came white from the printer. I tried out tea staining to give the poster a more antique look. See the tea staining post here.
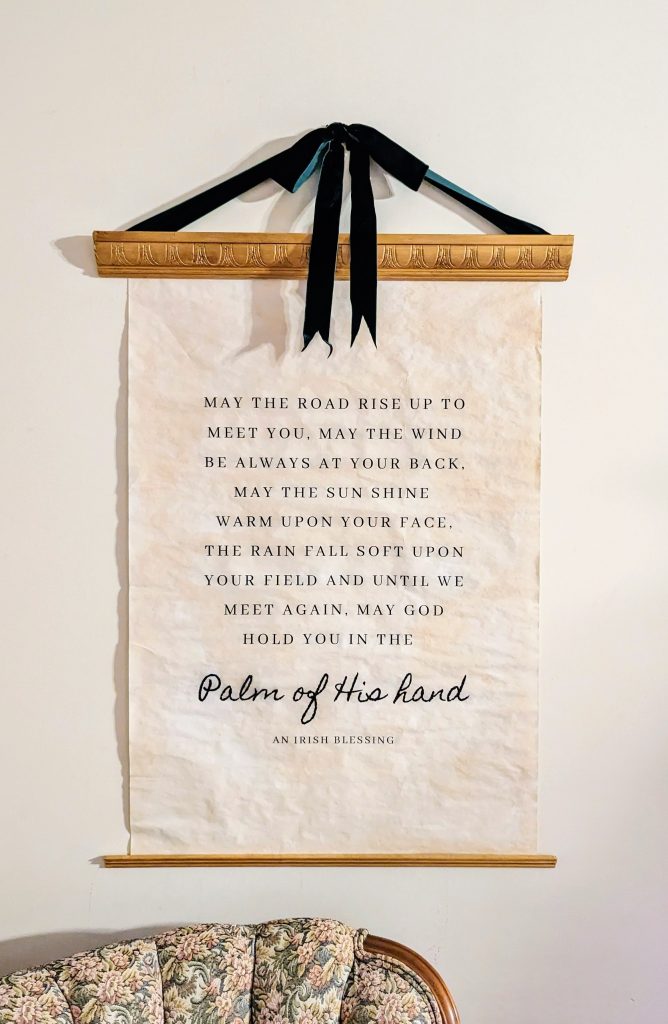
This DIY poster hanger is a beautiful yet budget friendly option for posters and prints. Putting it together was so fun! I am sure I will use this method again in other parts of the house!
Have you tried any DIYs for hanging artwork? I’d love to hear about it!